When it comes to the ultimate dessert experience, few flavor profiles can compete with the legendary marriage of salty peanut butter and deep, dark chocolate. This no-bake peanut butter lasagna is more than just a sweet treat; it is a structural masterpiece of textures and temperatures, designed to satisfy the most intense cravings with zero oven time required.
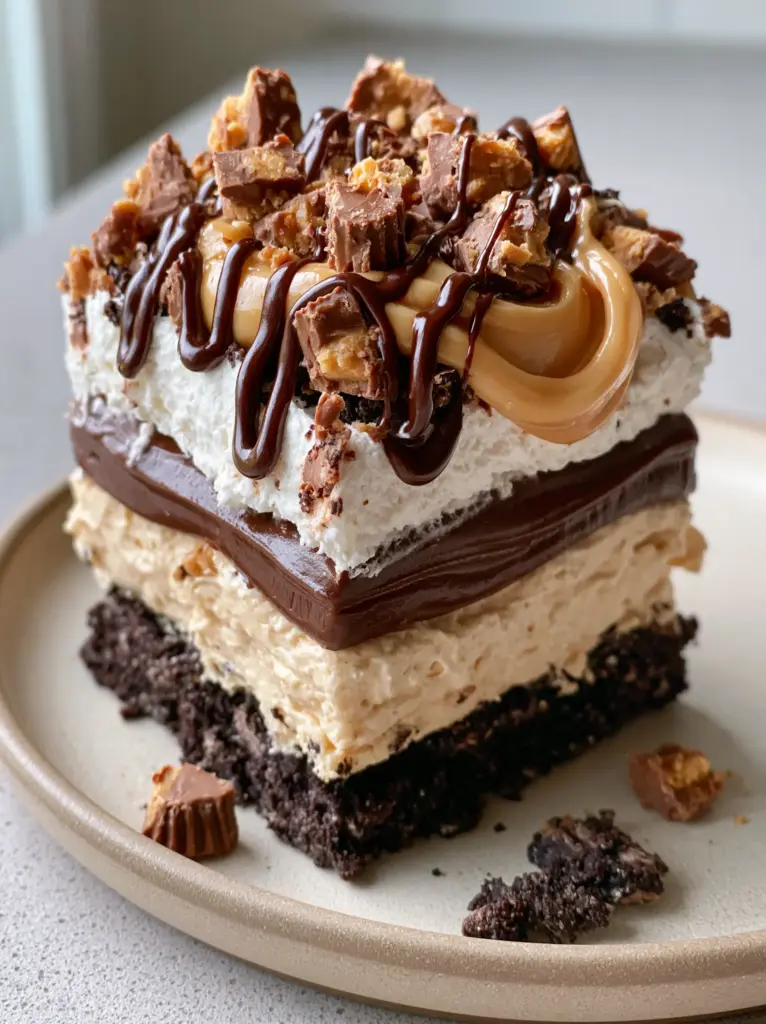
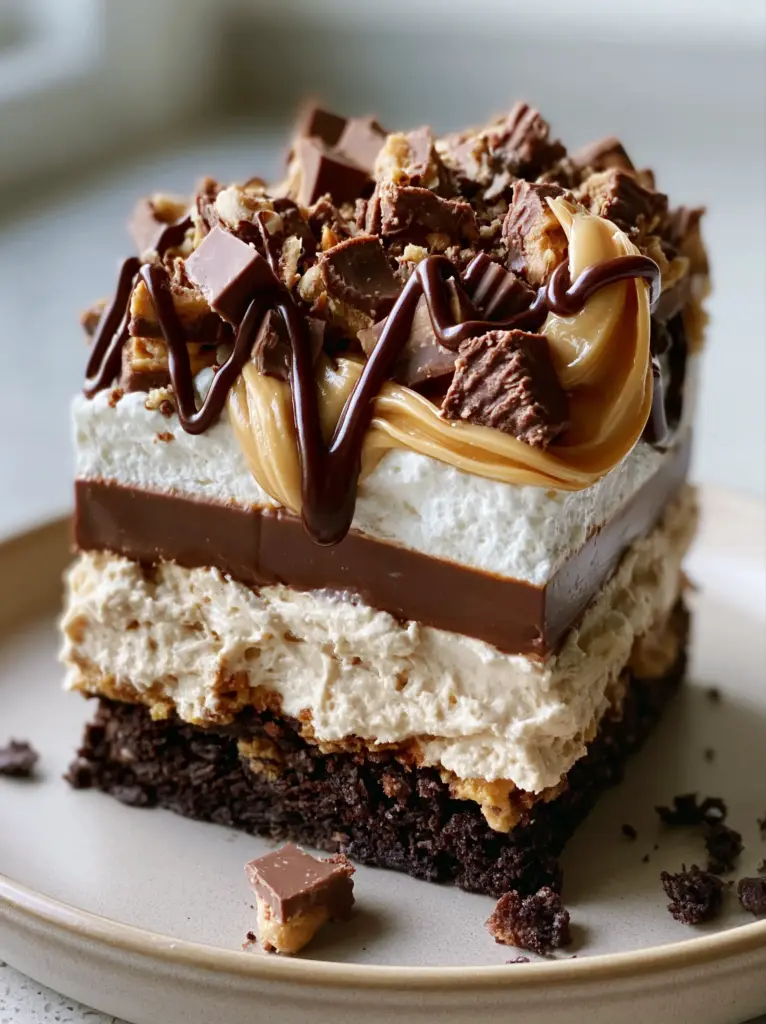
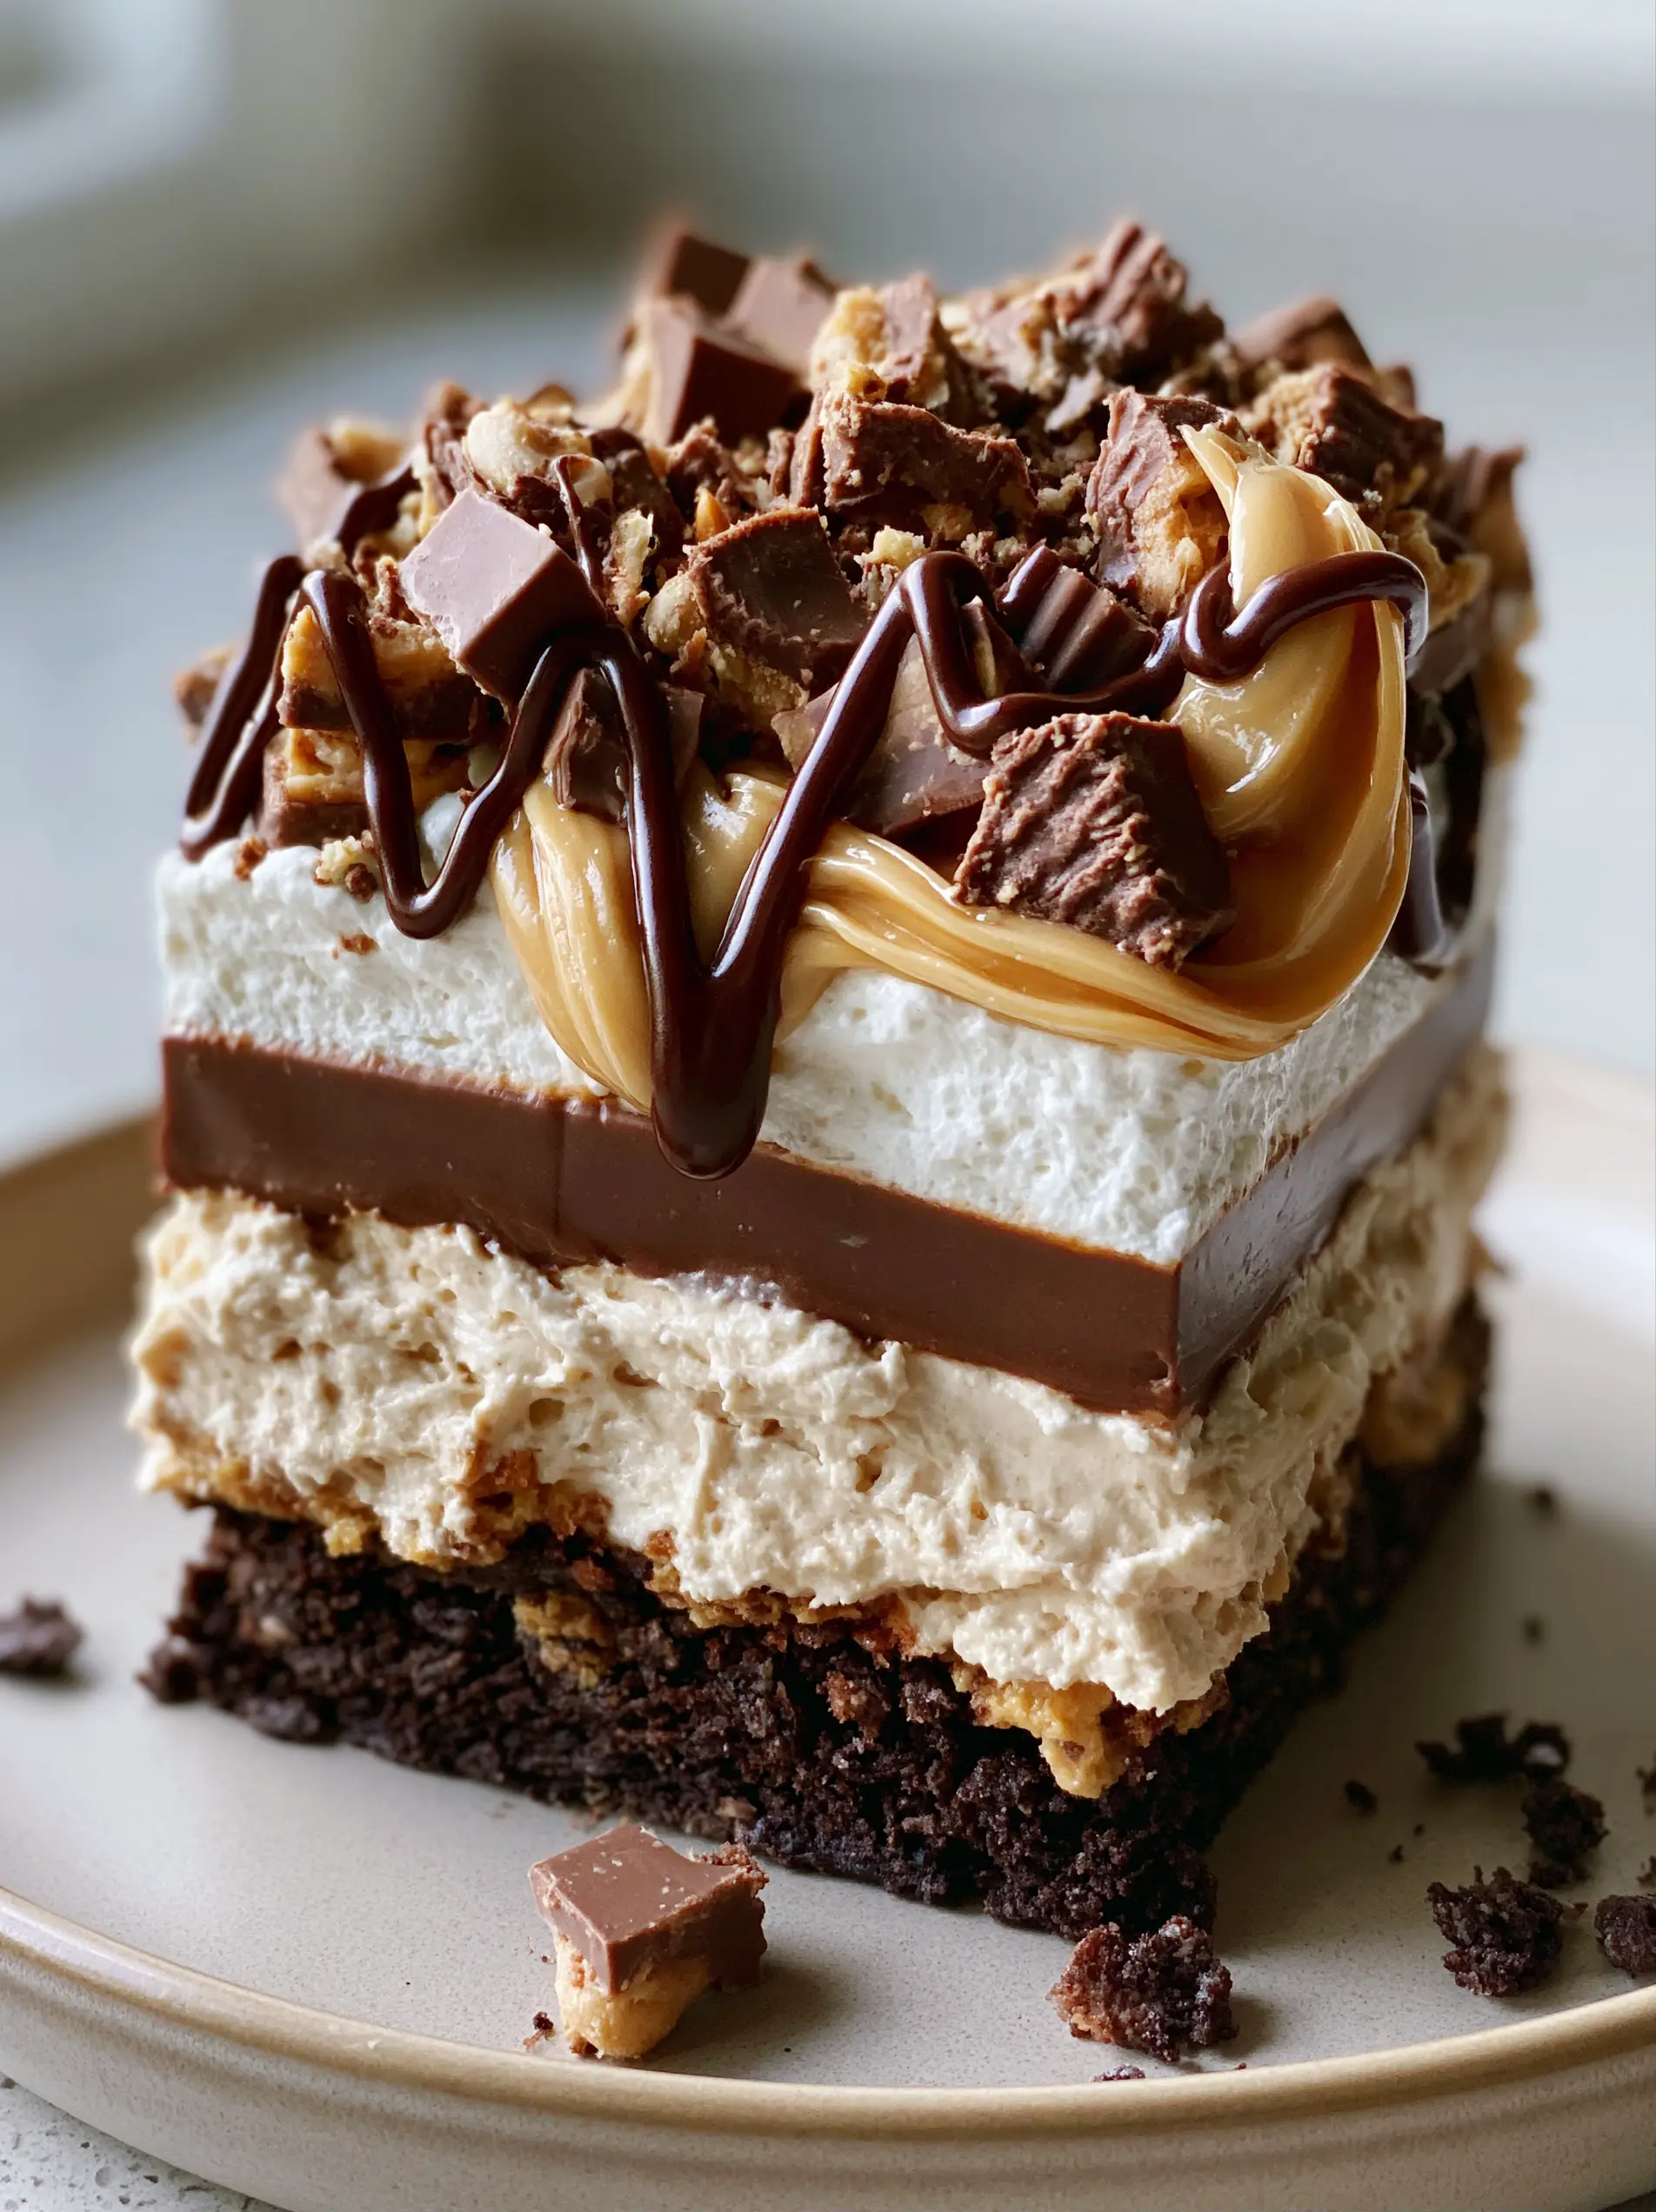
Imagine a tall, square slice standing proudly on a matte ceramic plate, showcasing four distinct, perfectly straight layers that look as if they were engineered by a culinary architect. The soft natural daylight from a nearby window catches the gentle highlights on the creamy textures, making the glossy chocolate drizzle shimmer with irresistible appeal.
Whether you are looking for an impressive finale for your next dinner party or a simple yet decadent indulgence for a quiet weekend, this dessert delivers on every promise. From the densely packed dark chocolate cookie base to the airy white whipped cream crown, every bite is a journey through the best of pastry science and home-style comfort.
What Makes This Layered Dessert So Irresistible?
- Unmatched Structural Integrity: Unlike many “lush” desserts that collapse when sliced, our technique ensures a tall, clean square slice with four distinct, visible layers.
- Multi-Textural Complexity: Experience the satisfying crunch of a dark chocolate cookie crumb crust paired with the silkiness of dark chocolate pudding and the fluffiness of peanut butter cream cheese.
- The Visual “Wow” Factor: Topped with jagged chunks of chopped milk chocolate peanut butter cups and a dual drizzle of glossy chocolate ganache and melted peanut butter, this dish is a photographer’s dream.
- Effortless Preparation: This is a completely no-bake recipe, making it one of our favorite lazy dessert solutions that looks like it took hours of professional effort.
The Ultimate Pantry List for Layered Perfection
Achieving the forensic visual accuracy of this dessert requires a specific set of high-quality components. We don’t just choose ingredients for taste; we choose them for their scientific ability to hold a shape and provide that “silk pudding” mouthfeel.
The Foundations of the Chocolate Cookie Crust
Dark Chocolate Sandwich Cookies: You will need 36 cookies (approximately 15.5 oz or 440g) finely crushed. These provide the dark, densely packed base that supports the weight of the upper layers.
Unsalted Butter: 6 tbsp (85g) of melted butter acts as the “glue.” It binds the crumbs together into a stable, non-crumbly foundation once chilled.
The Light-Tan Whipped Peanut Butter Cream Cheese Fluff
Full-Fat Cream Cheese: 1 package (8 oz or 225g), softened to room temperature. This provides the structural body and a slight tang to balance the sugar.
Creamy Peanut Butter: 1 cup (250g) of a standard commercial brand (like Jif or Skippy) is recommended over “natural” varieties. The stabilizers in commercial peanut butter ensure the layer stays whipped and fluffy without separating.
Powdered Sugar: 1 cup (120g) to sweeten and further stabilize the cream cheese mixture.
Whipped Topping: 1.5 cups (approx 115g) folded in to create that signature light-tan airy texture that defines the second layer.
The Smooth Dark Chocolate Silk Pudding Layer
Instant Dark Chocolate Pudding Mix: Two boxes (3.9 oz or 110g each). Instant pudding is essential here for its quick-setting properties which maintain those straight, forensic layers.
Whole Milk: 2.75 cups (660ml) of cold milk. We use slightly less milk than the box call for to ensure the pudding is extra-thick and “silky.”
The Airy White Crown and Garnishes
Whipped Topping or Fresh Whipped Cream: 2 cups (approx 150g) for the final top layer. This provides the “airy white” contrast against the dark chocolate below.
Reese’s Peanut Butter Cups: 1 cup (approx 150g) of jagged chunks. Chopping them roughly creates a rustic, artisanal look rather than using uniform minis.
Chocolate Syrup & Peanut Butter Drizzle: For the finishing touch, a zig-zag of glossy chocolate ganache and a thick swirl of melted peanut butter create the professional “food blog” aesthetic.
Essential Equipment for a Flawless Slice
To achieve the “side-angle, close-up” beauty seen in professional photography, you need the right tools. A 9×13 inch (23x33cm) glass or ceramic baking dish is standard, but for the tallest layers, an 8×8 inch (20x20cm) square dish is preferred.
You will also need a high-powered food processor to get those chocolate cookie crumbs fine enough to pack densely. A stand mixer or electric hand mixer is vital for whipping the cream cheese and peanut butter into a light-tan fluff without any lumps.
Finally, an offset spatula is your best friend. This tool allows you to smooth each layer perfectly flat, ensuring the “four distinct, perfectly straight layers” required by our visual blueprint.
Mastering the Layers: A Professional Step-by-Step
Constructing the Densely Packed Base
Begin by pulsing your dark chocolate cookies in a food processor until they resemble fine sand. Pour in the melted butter and pulse until the mixture looks like wet soil.
Press this mixture firmly into the bottom of your dish. Use the bottom of a heavy measuring cup to pack it down; this prevents stray chocolate cookie crumbs from migrating into the lighter layers above.
Whipping the Peanut Butter Cream Cheese Fluff
In a large bowl, beat the softened cream cheese and creamy peanut butter until completely smooth. Add the powdered sugar slowly to avoid a “sugar cloud” in your kitchen.
Gently fold in the whipped topping using a spatula. You are looking for a light-tan, uniform color. Spread this carefully over the chilled crust, using your offset spatula to reach the corners and create a level surface.
Preparing the Dark Chocolate Silk Pudding
In a separate bowl, whisk the instant dark chocolate pudding mix with the cold whole milk for two minutes. You will feel the whisk begin to meet resistance—this is the “set” beginning to happen.
Wait about 3 minutes until the pudding is semi-firm, then pour it over the peanut butter layer. Smooth it out quickly before it fully sets to ensure a mirror-like finish for the “silk pudding” effect.
The Final Crown and Artistic Garnish
Once the pudding has chilled and firm (about 10 minutes in the fridge), spread the final layer of white whipped cream over the top. It should look airy and light, like a fresh snowfall.
Now comes the forensic garnish: Scatter the jagged chunks of peanut butter cups across the top. Microwave a bit of peanut butter for 20 seconds until it is pourable, then zig-zag it across the top along with the glossy chocolate syrup.
Expert Tips for Visual and Flavor Success
- The “Clean Cut” Secret: For those perfectly straight layers, freeze the lasagna for 30-60 minutes before slicing. Use a sharp knife dipped in hot water and wiped dry between every single cut.
- Temperature Control: Ensure your cream cheese is truly at room temperature. If it is cold, you will end up with tiny white lumps in your peanut butter fluff, ruining the “light-tan” visual uniformity.
- Cookie Crumbs Matter: Do not remove the cream filling from the sandwich cookies! That cream adds stability and sweetness to the crust that plain cocoa wafers lack.
- Pudding Thickness: If you want an even more stable dessert, you can use a “heavy cream and milk” blend (50/50) for the pudding layer. This makes it incredibly rich and sturdy.
Planning Ahead: Storage and Freshness
This no-bake peanut butter lasagna is an excellent candidate for advance prep. In fact, it tastes better after 4-24 hours in the refrigerator, as the cookie crust softens slightly into a “cake-like” texture while the layers fuse together.
Keep the dish covered tightly with plastic wrap or a lid. It will remain fresh and visually appealing for up to 4 days in the refrigerator. We do not recommend freezing for long-term storage, as the pudding layer can become “weepy” or change texture upon thawing.
If you enjoy this style of dessert, you might also love our key lime pie jars for a more citrusy, individual-portion take on the no-bake crust technique.
Perfect Pairings for Your Peanut Butter Feast
While this dessert is a star on its own, it fits beautifully into various menus. If you are hosting a summer gathering, consider serving it after a round of refreshing watermelon fries to cleanse the palate.
For a holiday spread, it stands up well alongside other finger-friendly treats like Easter finger foods or a festive 4th of July pie. The richness of the chocolate and peanut butter also pairs exceptionally well with a strong cup of espresso or a cold glass of milk.
Common Questions About No-Bake Lasagnas
Yes! This dessert is actually better when made 12-24 hours in advance, allowing the layers to set firmly and the flavors to meld perfectly.
We recommend against using natural ‘oil-separation’ peanut butter. The stabilizers in commercial creamy peanut butter are necessary to keep the whipped layer fluffy and structurally sound.
Freeze the lasagna for 30 minutes before cutting. Use a sharp, thin knife dipped in hot water, wiping it clean after every single slice to maintain the four distinct layers.
A food processor is best for a fine, sand-like texture. If you don’t have one, place cookies in a gallon bag and use a rolling pin to crush them as finely as possible.
To get perfectly straight layers, ensure the chocolate crust is frozen before adding the peanut butter fluff, and let the pudding set slightly before spreading. Chilling the whole dish for 4+ hours is essential.
The Ultimate No-Bake Peanut Butter Lasagna Recipe
No-Bake Peanut Butter Lasagna with Rich Chocolate Pudding
Ingredients
Equipment
Method
- Pulse cookies in a food processor until fine crumbs form. Mix with melted butter.
- Press firmly into a 9x13 dish. Chill in the freezer for 10 minutes to set.
- Beat cream cheese and peanut butter until smooth. Add powdered sugar.
- Fold in whipped topping and spread over the crust in a straight, even layer.
- Whisk pudding mix and milk for 2 minutes. Let stand for 3 minutes to thicken.
- Spread the silk pudding over the peanut butter layer carefully.
- Spread remaining whipped topping over the set pudding.
- Top with chopped peanut butter cups and zig-zag drizzles of chocolate and melted peanut butter.
Notes
Use a hot knife to slice through the dense cookie base effortlessly.
Sharing the Peanut Butter Love
We hope you enjoy making (and eating!) this decadent no-bake peanut butter lasagna. Its combination of structural beauty and nostalgic flavors makes it a recurring favorite in our kitchen. If you tried this recipe, we would love to hear about it! Leave a comment below and tell us how your layers turned out.
Don’t forget to follow us on Pinterest for more visually stunning recipe inspiration and culinary tips. Pin this recipe to your “Dessert Goals” board so you always have it ready for your next chocolate-peanut butter emergency!