There is something undeniably nostalgic about the tart, zesty snap of a classic key lime pie, but when you serve it in chilled glass mason jars, it transforms into an elegant, modern showstopper. These key lime pie jars are the answer to your summer entertaining prayers, offering perfectly portioned layers of buttery crumbs and silky citrus cream.
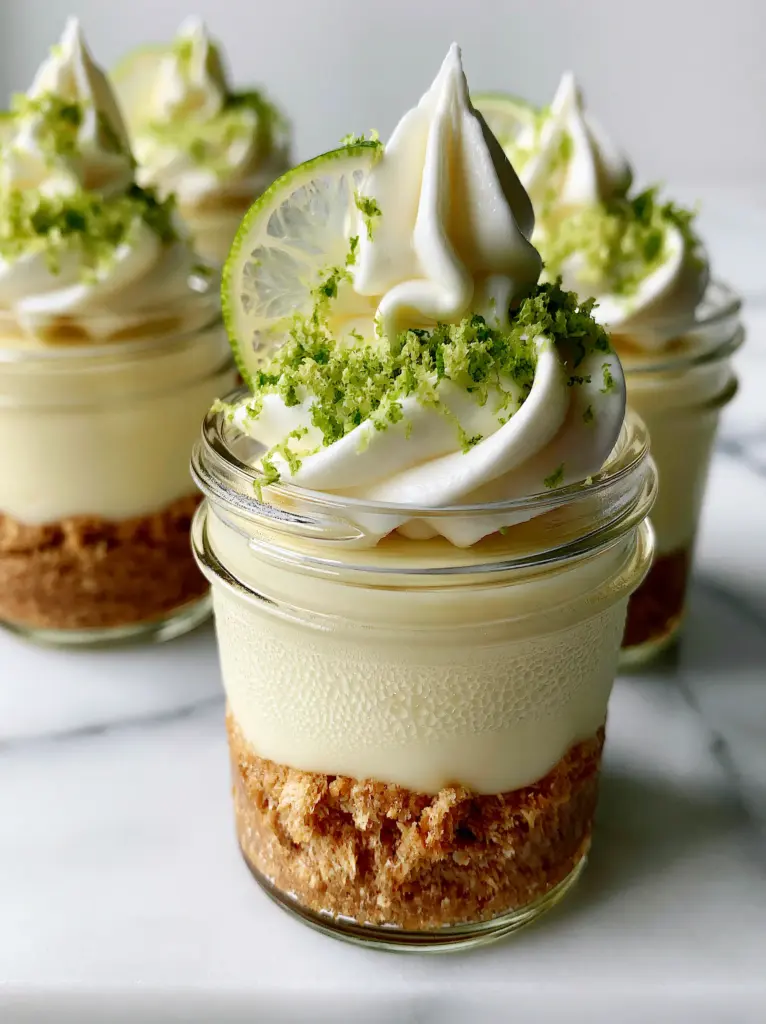
Imagine pulling a frosty jar from the refrigerator, the glass covered in a light chilled condensation that hints at the refreshing treat inside. This isn’t just a dessert; it is a sensory experience that balances the crunch of a compressed graham cracker crust with the velvet-smooth texture of a dense, pale-lime filling.
Whether you are planning a backyard barbecue or looking for the perfect summer dessert recipes, these portable treats are designed for maximum flavor and visual impact. By following this forensic-level guide, you will master the art of the “stiff peak” and the “perfectly compressed base” every single time.
Why These Individual Key Lime Treats are a Total Game Changer
- Textural Perfection: You get a thick, compressed layer of golden-brown crumbs that stays crunchy against the dense, silky filling.
- Portability: Since they are built in glass mason jars, these are the ultimate mess-free option for picnics or an alternative 4th of July pie.
- Visual Elegance: With vibrant green lime zest and translucent lime slices, these jars look like they were plucked straight from a professional pastry chef’s kitchen.
- Make-Ahead Magic: These actually improve with time, making them a stress-free addition to your Easter finger foods or summer party menu.
The Foundation: Essential Ingredients for Architectural Integrity
To achieve the “dense and silky” look seen in our visual blueprint, every ingredient must serve a structural and flavor purpose. We are not just making a filling; we are building a stable, chilled masterpiece.
Graham Cracker Crumbs (1.5 cups / 180g): These provide the earthy, honey-sweet base that anchors the tartness of the lime. Ensure they are finely ground to allow for maximum compression.
Unsalted Butter (6 tbsp / 85g): Once melted and mixed, the butter acts as the “glue” for your crust. It ensures your golden-brown layer remains solid and doesn’t crumble into the cream.
Full-Fat Cream Cheese (16 oz / 450g): This is the secret to the “cheesecake-style” dense texture. It must be room temperature to ensure a perfectly smooth, lump-free filling.
Sweetened Condensed Milk (14 oz / 395g): This provides the signature pale-lime color and the essential sweetness to balance the high acidity of the citrus juice.
Authentic Key Lime Juice (1/2 cup / 120ml): While regular limes work, authentic Key limes offer a unique floral aroma and a sharper punch that defines the dish.
Heavy Whipping Cream (1 cup / 240ml): Used for the Chantilly topping, this must be cold to achieve those large, stiff-peaked swirls that crown the jar.
Must-Have Equipment for Professional Results
To replicate the low-angle, elegant smartphone photo aesthetic, you need the right tools to handle the delicate layers of your key lime pie jars.
Glass Mason Jars (8 oz / 240ml size): Clear glass is essential so guests can see the distinct, clean lines between the golden crust and the pale-green filling.
Tamper or Flat-Bottomed Glass: You need something to firmly press the graham cracker mixture into a thick, compressed layer at the bottom of the jar.
Electric Hand Mixer or Stand Mixer: Achieving a “dense, silky” filling requires vigorous aeration of the cream cheese before the liquids are added.
Piping Bag with a Large Star Tip: This is how you create that iconic, stiff-peaked Chantilly swirl that looks both rustic and refined.
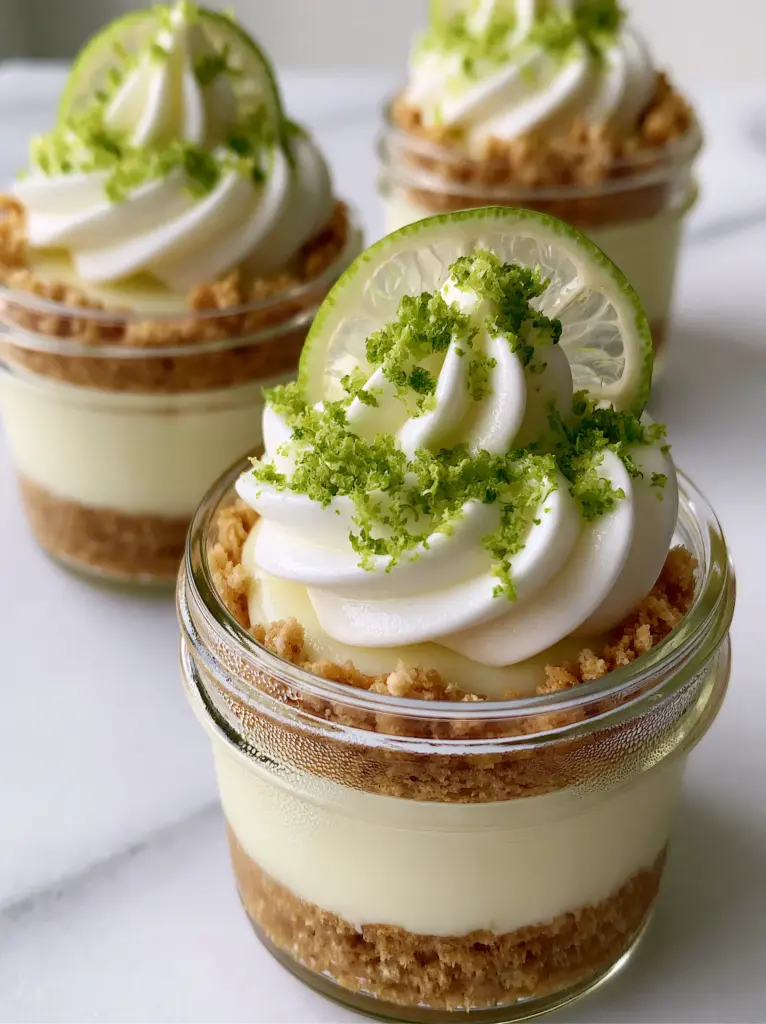
Constructing the Perfect Base: The Buttery Graham Cracker Layer
Prepping the Golden-Brown Crumbs
In a medium bowl, combine your finely ground graham cracker crumbs with a pinch of salt and two tablespoons of granulated sugar. Pour the melted butter over the mixture and toss with a fork until it resembles wet sand.
The goal is a mixture that holds its shape when squeezed. If it feels too dry, add an extra teaspoon of melted butter; you want that deep golden-brown hue to pop against the white marble background.
The Art of Compression
Divide the mixture evenly among three to four glass mason jars. Using a small tamper or the end of a wooden spoon, press down with significant force.
Visual Cue: Look for a solid, uniform layer about half an inch thick. There should be no loose crumbs floating on the surface, as this creates a clean “shelf” for your filling to sit upon.
Crafting the Dense and Silky Pale-Lime Filling
Creaming for Texture
In your mixing bowl, beat the room-temperature cream cheese until it is completely smooth and contains no visible lumps. This step is critical for achieving the “perfectly smooth” look of our visual prompt.
Slowly drizzle in the sweetened condensed milk while the mixer is on low. This gradual integration prevents the dense fats from separating, resulting in a silky, uniform emulsion.
The Citrus Transformation
Add your key lime juice and a tablespoon of finely grated lime zest. As the acid from the lime juice hits the proteins in the dairy, you will see the mixture begin to thicken instantly.
Visual Cue: The filling should be a very pale-lime color, almost like a pastel mint. It should be thick enough to hold a soft ribbon shape when the beaters are lifted from the bowl.
Creating the Stiff-Peaked Chantilly Whipped Cream
Achieving Maximum Volume
Pour your cold heavy cream into a chilled bowl. Chilling the bowl is a professional tip that helps the fat molecules stay stable, allowing for a “stiff whipped cream swirl.”
Add 2 tablespoons (30g) of powdered sugar and a teaspoon of vanilla extract. Beat on medium-high speed until the cream moves past the “soft peak” stage and forms sharp, rigid peaks that do not droop.
Piping the Crown
Transfer the whipped cream to a piping bag. Starting from the center of the jar and moving outward in a circular motion, pipe a large, generous swirl onto the chilled lime filling.
The visual prompt calls for a “large, stiff-peaked swirl,” so don’t be shy with the height. This height creates the elegant silhouette seen in high-end food photography.
The Final Touch: Garnishing for Visual Impact
To finish your key lime pie jars, you need to add the “forensic” details that make the dish look authentic and fresh. Start with a heavy dusting of vibrant green lime zest over the top of the cream.
Take a fresh lime and cut it into paper-thin slices. Slice those circles in half to create a “translucent half-moon slice” and nestle it into the side of the whipped cream swirl at a 45-degree angle.
Visual Cue: The lime slice should look wet and glistening. This contrast against the matte white of the whipped cream provides the “low-angle smartphone photo” pop that makes the recipe look professional.
Expert Tips for Success Every Time
- Room Temp is Key: Never try to blend cold cream cheese. You will end up with tiny white lumps that ruin the “silky” visual of the filling.
- Zest Before Juicing: It is nearly impossible to zest a lime after it has been squeezed. Always gather your “vibrant green” garnish first.
- The Condensation Effect: For that “chilled condensation” look in your photos, place the empty jars in the freezer for 10 minutes before filling them.
- Setting Time: While you can eat these immediately, they reach their “dense” peak after at least 4 hours of refrigeration.
What to Pair with Your Key Lime Pie Jars
These tart jars are a fantastic palate cleanser. They pair beautifully with savory, rich dishes like a walking taco casserole or even a hearty Southern tomato pie recipe.
If you are looking for more quick options for a weeknight, these jars are the perfect reward after one of your favorite lazy dinners. The acidity of the lime cuts through heavy fats perfectly.
Frequently Asked Questions
Absolutely. They are best made at least 4 hours in advance to allow the filling to set. They will keep perfectly in the refrigerator for up to 3 days.
Yes, you can use standard Persian limes. While the flavor will be slightly less floral and more acidic, the ‘dense and silky’ texture of the filling will remain identical.
Start with very cold heavy cream and a chilled bowl. Beat until the cream is stiff enough to stand straight up on the whisk—this ensures it holds its shape on top of the jar.
Ensure you are using full-fat cream cheese and that your lime juice is added slowly. The acid in the juice reacts with the condensed milk to naturally thicken the filling as it chills.
This usually happens if the crumbs aren’t compressed enough or if there isn’t enough melted butter. Use a flat-bottomed tool to press the crumbs into a solid ‘shelf’ at the bottom of the jar.
Storing and Prepping Ahead
These jars are incredibly stable. You can store them in the refrigerator for up to 3 days. If you are making them for an event, I recommend adding the fresh lime slice and the zest just before serving to keep the lime from “wilting” or drying out.
Do not freeze these jars, as the cream cheese filling may change texture upon thawing, losing that “silky, dense” quality we worked so hard to achieve.
The Complete Key Lime Pie Jars Recipe
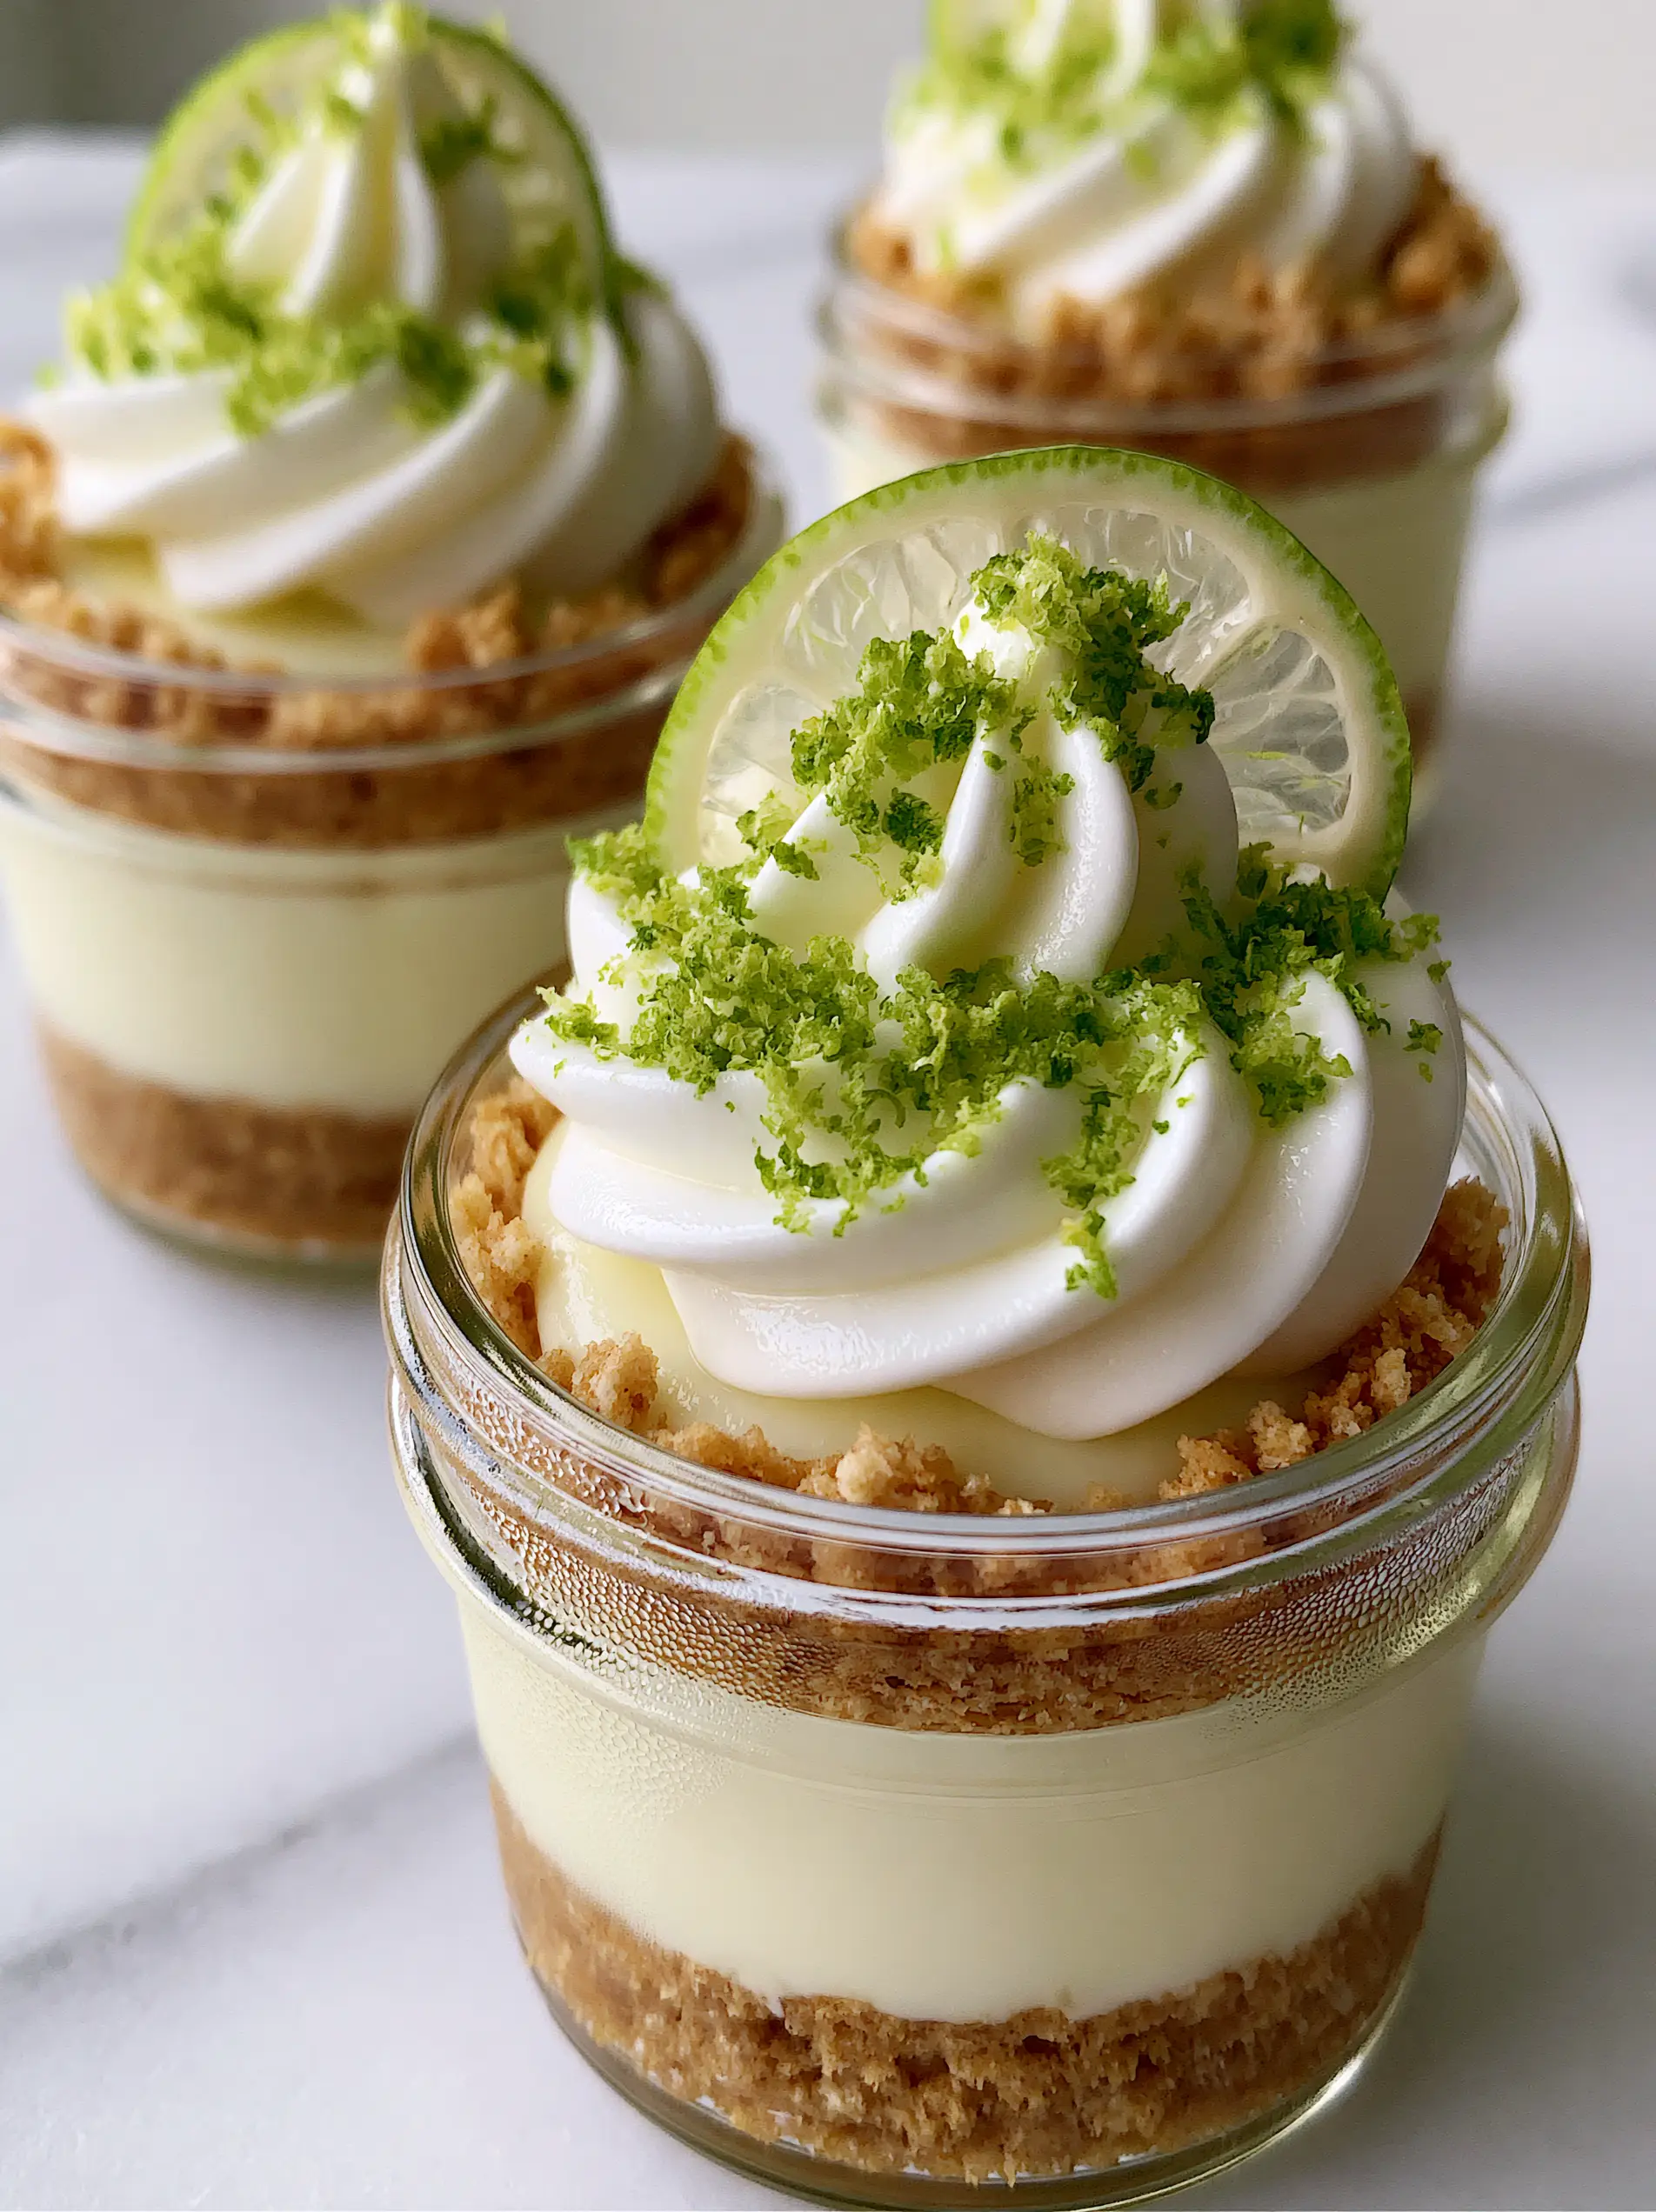
Key Lime Pie Jars: The Ultimate Individual No-Bake Summer Dessert
Ingredients
Equipment
Method
- Combine graham cracker crumbs, melted butter, and sugar in a bowl until it looks like wet sand.
- Distribute crumbs into three 8oz mason jars and press firmly with a tamper to create a solid, thick base.
- Beat softened cream cheese until perfectly smooth. Gradually beat in the condensed milk.
- Stir in the key lime juice and zest. The mixture will thicken into a dense, silky pale-green cream.
- Spoon the filling into the jars over the compressed crust, smoothing the tops.
- Whisk heavy cream, powdered sugar, and vanilla until stiff peaks form.
- Pipe a large swirl on each jar. Garnish with a translucent lime slice and a heavy dusting of zest.
Notes
For the best photo-ready look, chill your jars in the freezer for 10 minutes before filling to create natural condensation.
Join the Community!
If you loved making these key lime pie jars, we want to see your results! Did you manage to get that perfect “chilled condensation” on your mason jars? Leave a comment below and tell us how yours turned out.
Be sure to follow us on Pinterest for more inspiration and save this recipe to your “Summer Desserts” board so you never lose it!