There is a specific, almost architectural science behind the perfect chewy chocolate chip cookies recipe. It isn’t just about mixing dough; it is about creating a textural masterpiece with a soft-baked doughy center and those iconic, crispy rippled edges.
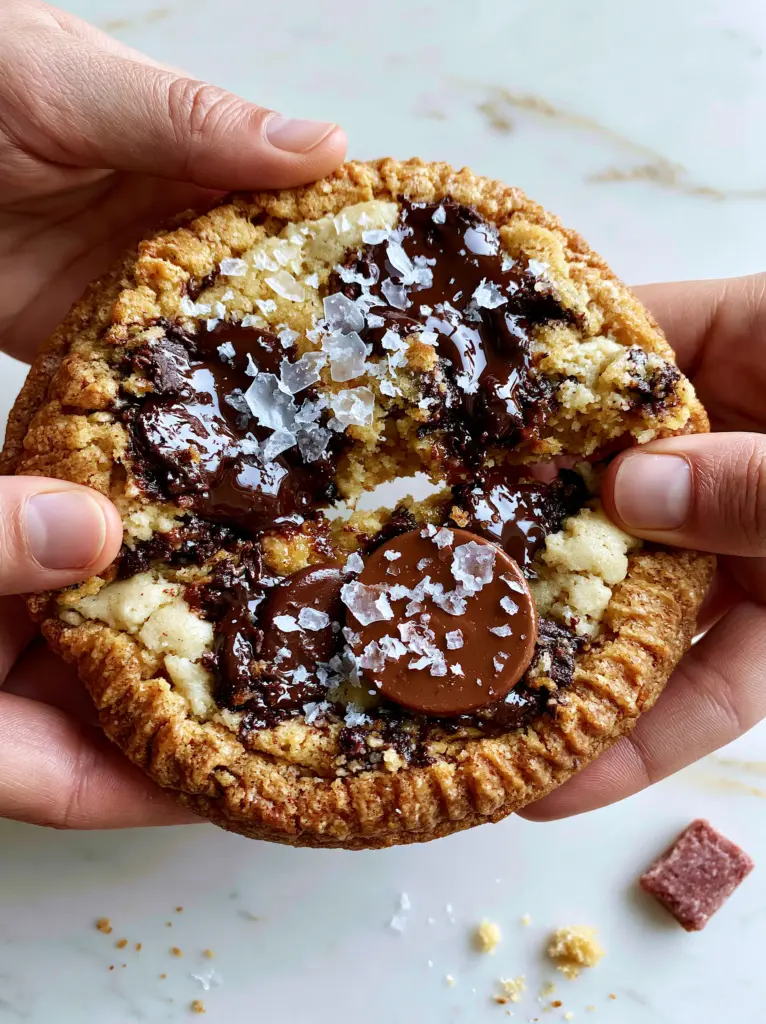
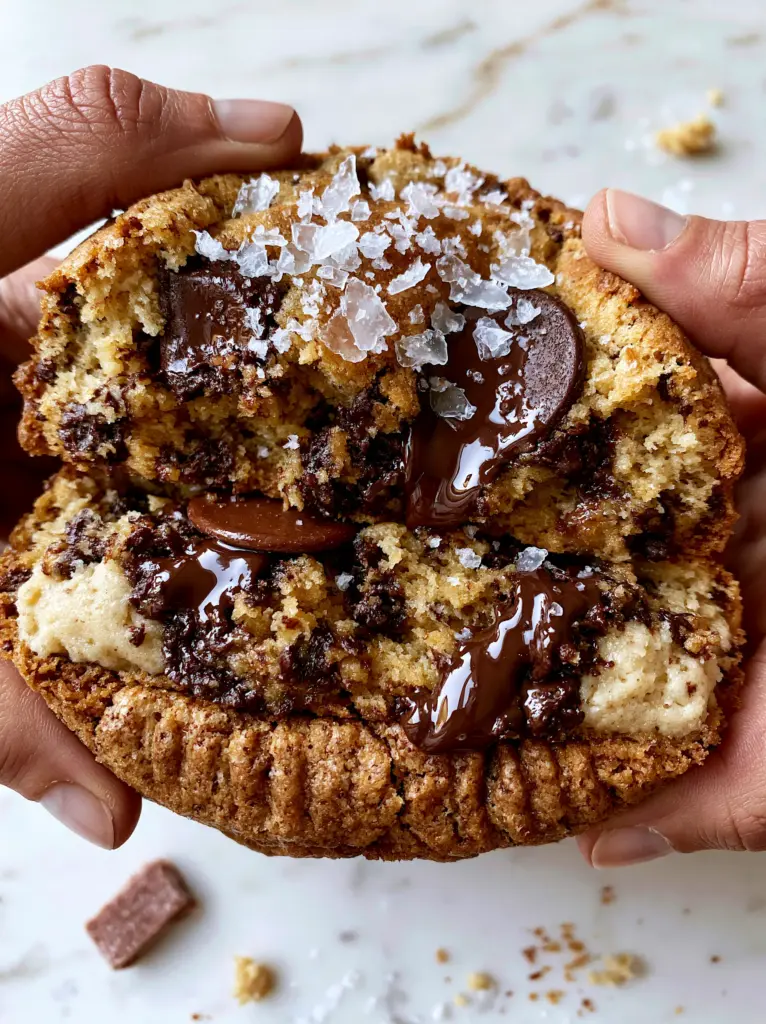
When you pull these cookies apart, the center should resist slightly before revealing a gooey, fudgy interior that looks almost underbaked. This recipe captures the exact visual of the professional bakery cookie: deep golden hues, brown butter specks, and glistening pools of dark chocolate.
By mastering the temperature of your fats and the specific timing of your bake, you can move beyond the average snack. This is a culinary experience defined by the crunch of translucent sea salt crystals against the richness of 70% dark chocolate.
The Anatomy of a Perfect Bakery-Style Cookie
- Rippled Crispy Edges: Achieved through a high sugar-to-flour ratio and a specific “pan-banging” technique during the bake.
- Gooey, Fudgy Centers: A result of high moisture content from brown sugar and a strategic underbake that sets as it cools.
- Aromatic Brown Butter Base: The foundation of the flavor profile, offering toasted hazelnut notes and visible “specks” in the dough.
- Fluid Chocolate Pools: Using chopped high-quality chocolate bars instead of chips ensures those wide, glistening reservoirs of cocoa.
The Essential Components for Structural Integrity and Flavor
Unsalted Butter: 1 cup (225g). We brown this butter to evaporate water and toast the milk solids, creating the “brown butter specks” that provide a deep, nutty complexity.
Dark Brown Sugar: 1 ¼ cups (250g). The high molasses content is the secret to the chewy chocolate chip cookies recipe, providing both the fudge-like texture and the deep golden-brown color.
Granulated Sugar: ½ cup (100g). This is what creates those crispy, caramelized edges that ripple outward as the cookie spreads in the oven.
Large Eggs: 2 (100ml). Ensure these are at room temperature to emulsify properly with the fats, creating a stable, lifted dough structure.
Vanilla Bean Paste: 1 tbsp (15ml). Using paste instead of extract adds those beautiful tiny black seeds and a more concentrated, floral aroma that stands up to the dark chocolate.
All-Purpose Flour: 2 cups (250g). This provides the necessary protein structure without making the cookie too “bready” or cake-like.
Baking Soda: 1 tsp (5g). This reacts with the acidic brown sugar to provide lift and helps the edges brown and crisp beautifully.
Dark Chocolate Bars (70% Cacao): 10 oz (280g). Chopping your own chocolate is non-negotiable for achieving the “oversized pools” seen in professional food photography.
Flaky Sea Salt: 1 tsp (5g). Large, translucent crystals like Maldon are the final garnish that balances the intense sweetness of the dough.
Must-Have Tools for the Professional Home Baker
To achieve the specific “bakery-style” look, you will need a heavy-duty light-colored baking sheet. Dark pans absorb too much heat and will burn the bottoms before the “soft pale doughy middle” is perfectly set.
A large cookie scoop (3-ounce capacity) is also vital. Massive cookies allow for a greater temperature gradient between the hot edges and the cool center, which is the key to that fudgy interior. If you are looking for more creative dessert inspiration, ensuring you have the right scoop size is a game-changer for all your baking projects.
The Master Technique for Brown Butter and Dough Prep
Toasting the Milk Solids (The Brown Butter Stage)
In a light-colored saucepan over medium heat, melt the butter. Once melted, it will begin to foam and pop; this is the water evaporating. Continue whisking until you see dark golden-brown bits forming at the bottom.
As soon as the butter smells like toasted hazelnuts and you see those brown butter specks, remove it from the heat immediately. Pour it into a heat-proof bowl, making sure to scrape all the brown bits out, and let it cool until it is no longer hot to the touch but still liquid.
Aerating the Sugars and Fats
Combine your cooled brown butter with the brown and granulated sugars. Use a whisk or stand mixer to beat them for 2-3 minutes. You are looking for a visual change: the mixture should lighten in color and look slightly “gritty” but cohesive.
Add the eggs one at a time, followed by the vanilla. Beat vigorously for another minute. This creates a “meringue-like” top layer that contributes to the crinkled, shiny surface of the final cookie.
Folding and Hand-Chopping the Chocolate
Sift your dry ingredients (flour, baking soda, salt) into the wet mixture. Use a rubber spatula to fold them in until just a few streaks of flour remain. Do not overmix, or you will develop too much gluten, making the cookies tough instead of chewy.
Roughly chop your dark chocolate bars into irregular pieces, ranging from small shavings to half-inch chunks. Fold these into the dough. This variety in size is what creates those “irregular pools of melted dark chocolate” that define a high-end bakery cookie.
The Baking Science: Ripples and Gooey Centers
The Chilling Phase (Non-Negotiable)
Chill your dough for at least 2 hours, or ideally 24 hours. This allows the flour to fully hydrate and the fats to solidify. Cold dough spreads more slowly, which is essential for creating the “crispy rippled edges” while keeping the center “soft and pale.”
The Pan-Banging Method
Preheat your oven to 350°F (175°C). Scoop large 3-ounce balls of dough onto the tray, leaving at least 3 inches of space between them. Bake for 10 minutes. At the 10-minute mark, lift the baking sheet and gently drop it against the oven rack.
This “bang” causes the center to deflate and the edges to push out, creating those beautiful ripples. Repeat this every 2 minutes until the edges are golden-brown but the center still looks slightly soft. Total bake time is usually 12-14 minutes.
Expert Tips for the Ultimate Chewy Cookie
- Check Your Oven Temp: Use an oven thermometer. If your oven is too cool, the cookies will dry out before they brown; if too hot, the edges will burn before the center is edible.
- The “Ring” Trick: Immediately after taking the cookies out, place a large circular cookie cutter or glass over each cookie and move it in a circular motion to “scoot” the edges into a perfect circle.
- Salt Timing: Apply the flaky sea salt the second the cookies leave the oven so the crystals adhere to the “fluid” chocolate pools.
- Room Temp Ingredients: Cold eggs will seize your brown butter, leading to a broken dough that won’t spread correctly.
Maximizing Your Cookie Experience
These cookies are a meal in themselves, but they pair beautifully with a cold glass of whole milk or a bitter espresso to cut through the richness of the dark chocolate. If you enjoy this flavor profile, you might also love our banana bread chocolate chip cookies for a more cake-like variation.
For those planning a gathering, these cookies make excellent New Year’s Eve snacks because they can be made ahead of time and baked fresh as guests arrive. They also fit perfectly on a platter alongside classic Nanaimo bars for a diverse dessert spread.
Storage and Preservation
Store these cookies in an airtight container at room temperature for up to 4 days. To maintain the “soft-baked doughy center,” place a piece of white bread in the container; the cookies will absorb the moisture from the bread.
You can also freeze the pre-scooped dough balls for up to 3 months. When the craving hits, bake them directly from the freezer, adding 2 minutes to the total baking time. This ensures you always have a “bakery-style” experience on demand.
Frequently Asked Questions
You can, but chips contain stabilizers that prevent them from melting into the ‘pools’ of chocolate seen in professional cookies. Chopped bars provide a superior texture and visual.
Use the ‘pan-banging’ technique. Lifting and dropping the pan during the final minutes of baking causes the dough to collapse and ripple outward, creating those crisp, wavy edges.
Browning the butter evaporates water and toasts the milk solids, creating a deep nutty flavor and the signature brown specks found in gourmet chewy chocolate chip cookies.
Chewiness comes from high moisture and protein (brown sugar and whole eggs), while crispiness comes from fat and granulated sugar. This recipe uses both to achieve a chewy center and crispy edges.
Cookies often turn out flat if the butter was too hot when mixed with the sugars or if the dough wasn’t chilled long enough. Chilling for at least 2 hours is essential for structural integrity.
The Master Chewy Chocolate Chip Cookie Recipe
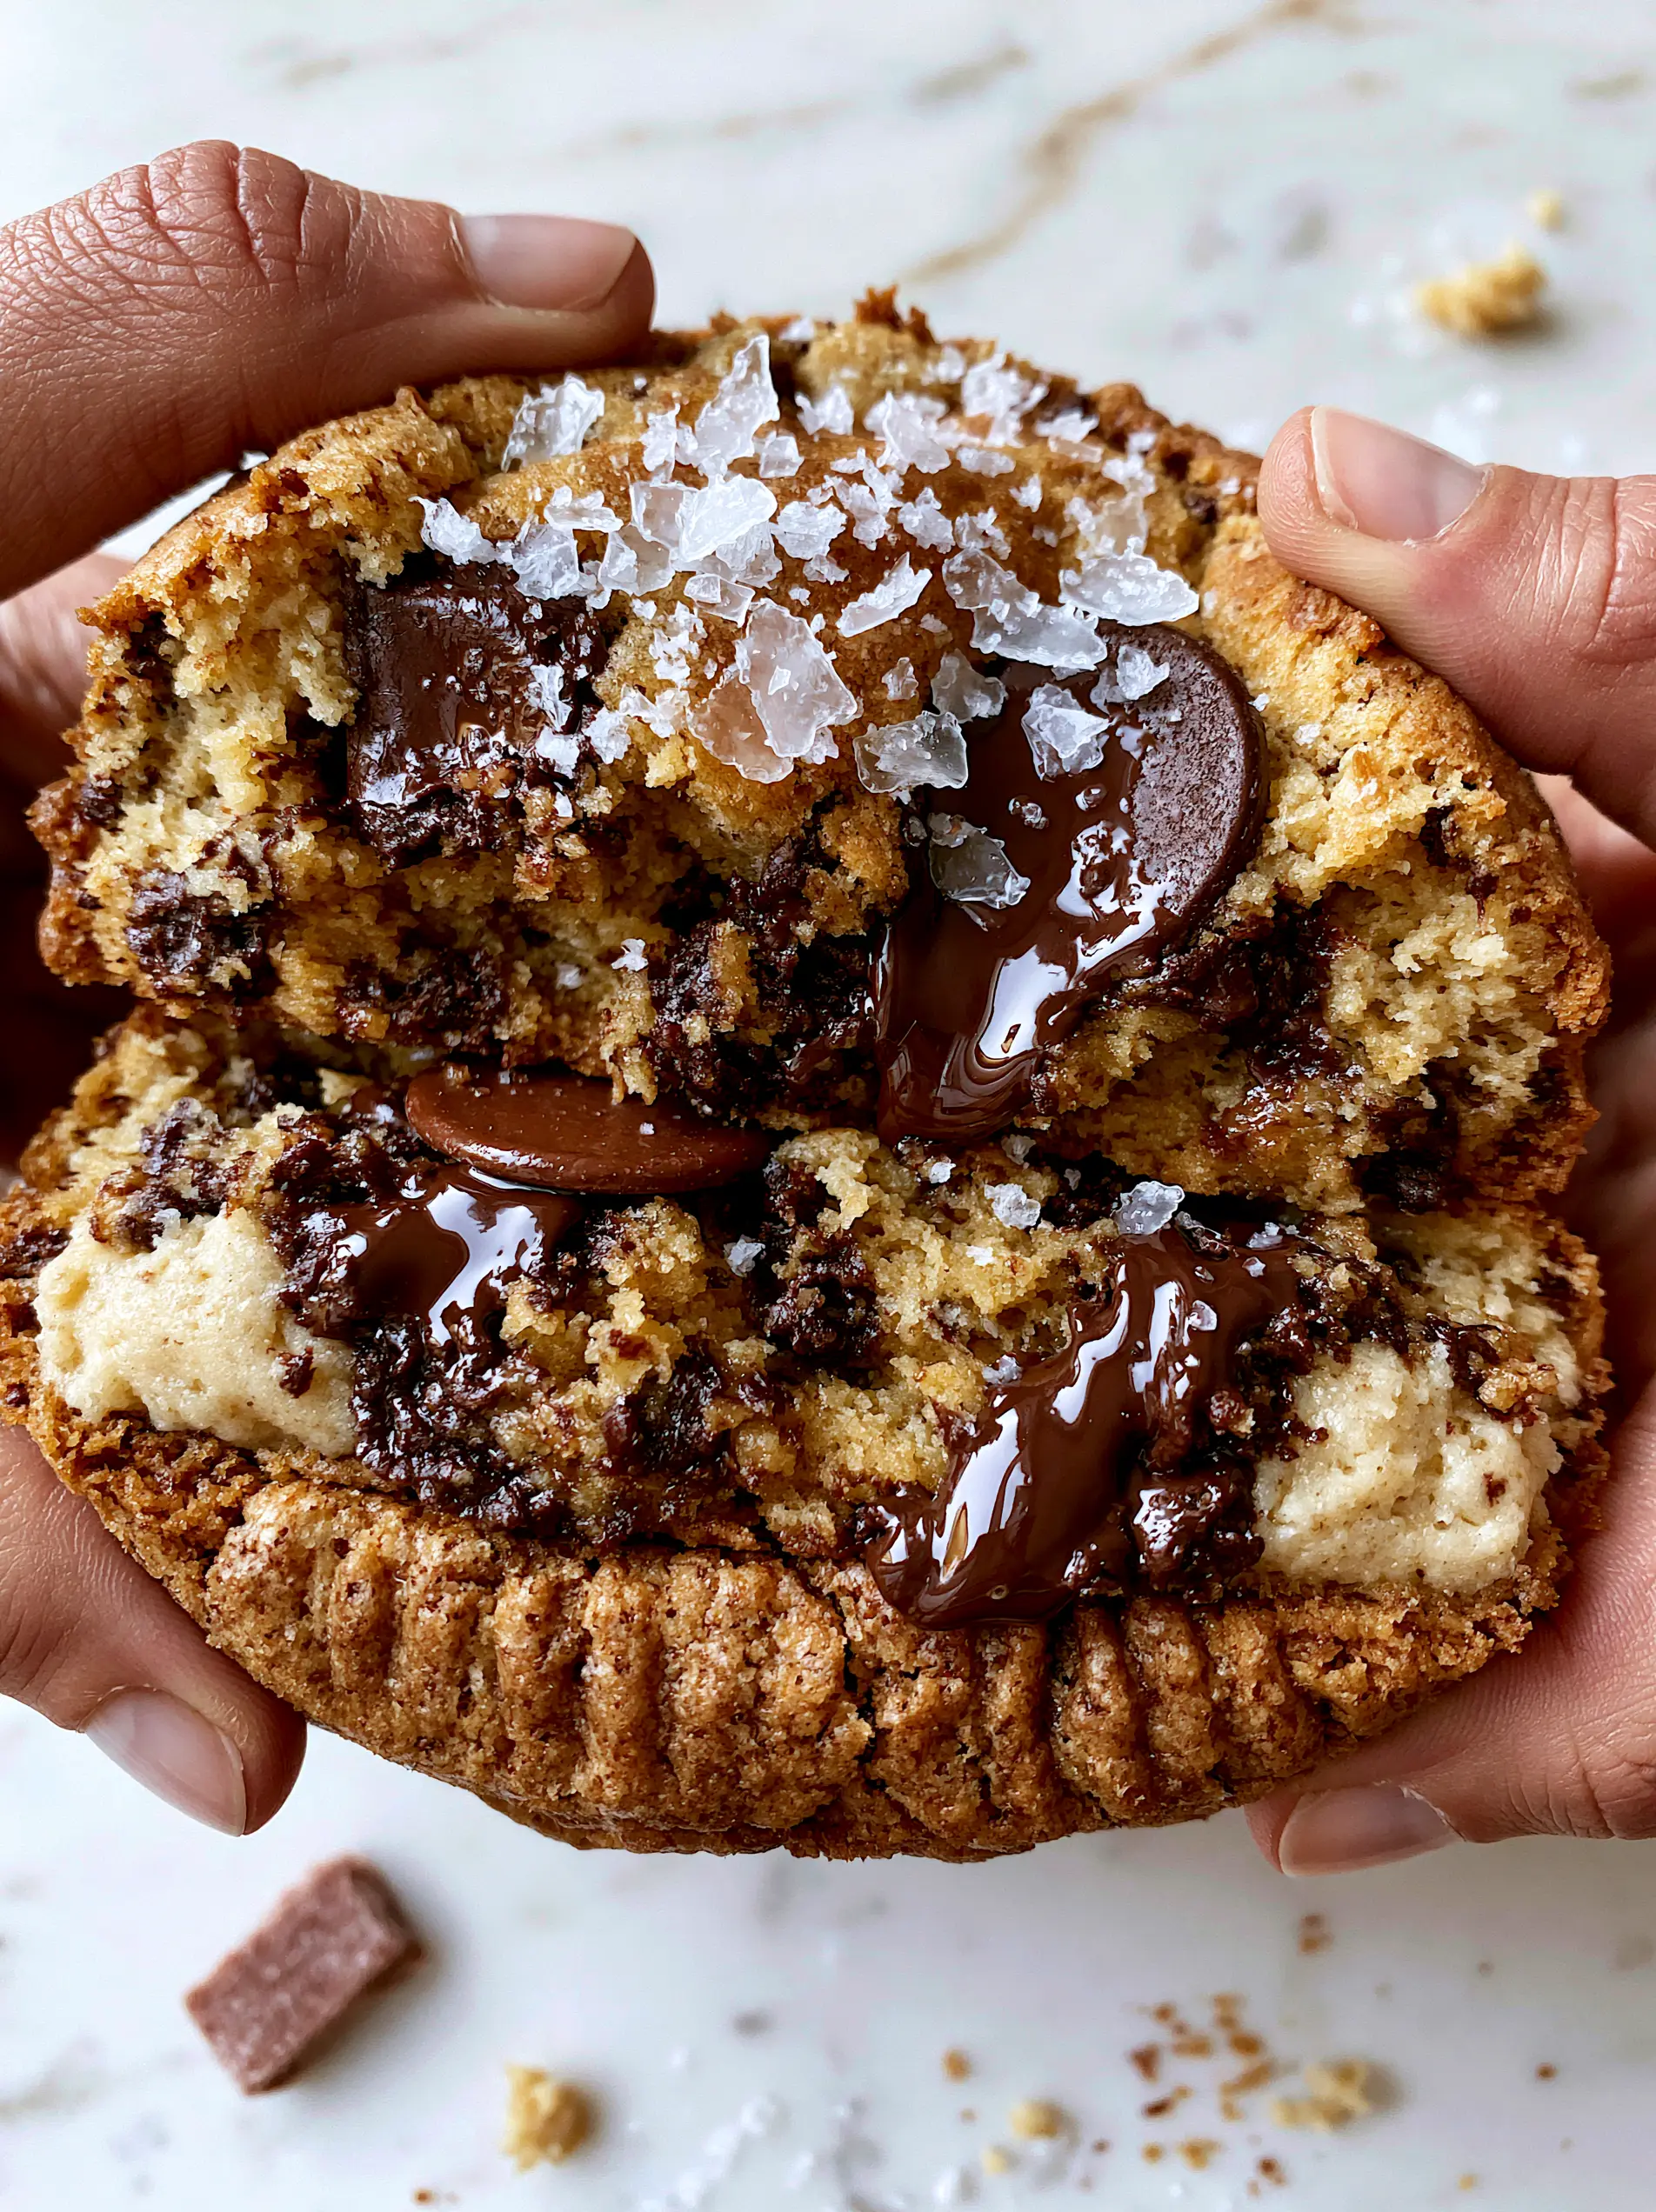
Chewy Chocolate Chip Cookies Recipe: The Ultimate Brown Butter Bakery Edition
Ingredients
Equipment
Method
- Melt butter in a saucepan over medium heat until it foams and brown specks appear. Cool until liquid but not hot.
- Whisk browned butter with both sugars for 2-3 minutes until lightened. Add eggs and vanilla, beating until glossy.
- Fold in flour and baking soda until just combined. Gently stir in chopped dark chocolate chunks.
- Chill dough for at least 2 hours. Scoop 3-ounce balls onto a lined tray, spaced 3 inches apart.
- Bake at 350°F (175°C) for 12-14 minutes. At 10 minutes, bang the tray against the rack to create ripples. Repeat every 2 minutes.
- Remove when edges are golden and center is pale. Top immediately with flaky sea salt.
Notes
Use high-quality chocolate bars instead of chips for the best melting properties.

Conclusion: The Ultimate Reward
Creating this chewy chocolate chip cookies recipe is a labor of love that rewards you with the ultimate sensory experience. From the sound of the pan-banging to the visual of the shimmering salt on dark chocolate, it is a recipe designed to impress.
If you made these, please leave a comment below and let us know how your ripples turned out! Don’t forget to share your photos with us on Pinterest and follow for more culinary deep-dives.