The Walking Taco Casserole is the quintessential comfort food that bridges the gap between nostalgic fairground snacks and a sophisticated weeknight family dinner. Imagine the crunch of a traditional walking taco, but transformed into a bubbling, gooey, and deeply savory masterpiece served straight from a cast iron skillet. This dish is designed to satisfy every sensory craving, from the sharp tang of melted cheddar to the refreshing crispness of cold iceberg lettuce.
In this recipe, we elevate the classic “taco in a bag” by layering premium ingredients and utilizing professional culinary techniques. By transitioning the components into a matte black skillet, we create a communal dining experience that is as visually stunning as it is delicious. Whether you are prepping for a busy weeknight or looking for the star of your next game day spread, this Walking Taco Casserole delivers on every front.
The beauty of this dish lies in its contrast. You get the hot, seasoned ground beef and earthy black beans against the cold, vibrant pops of Roma tomatoes and fresh jalapenos. It is a texture-driven experience that keeps you coming back for “just one more” bite of those golden, cheese-laden corn chips.
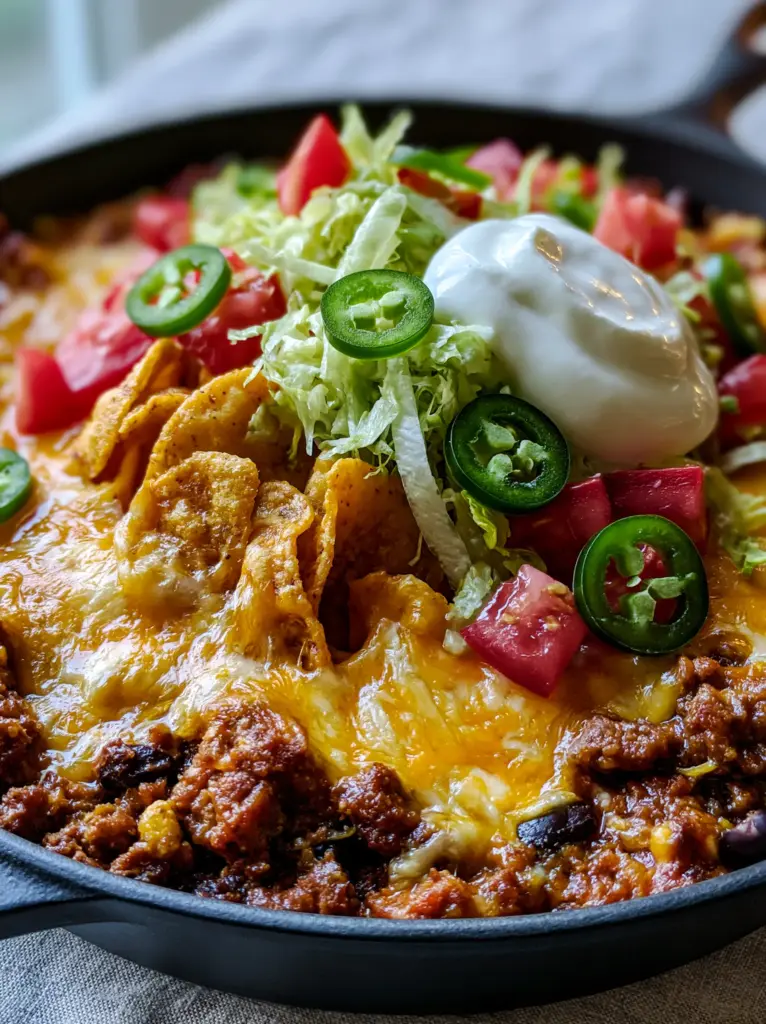
Why This Walking Taco Casserole Recipe Works
- Textural Harmony: We balance the “bubbling” heat of melted Monterey Jack and Cheddar with the “crunchy” golden corn chips and “crisp” shredded lettuce for a multi-dimensional mouthfeel.
- Flavor Depth: By combining lean ground beef with dark black beans and a bespoke taco seasoning blend, we ensure every bite is savory and satiating.
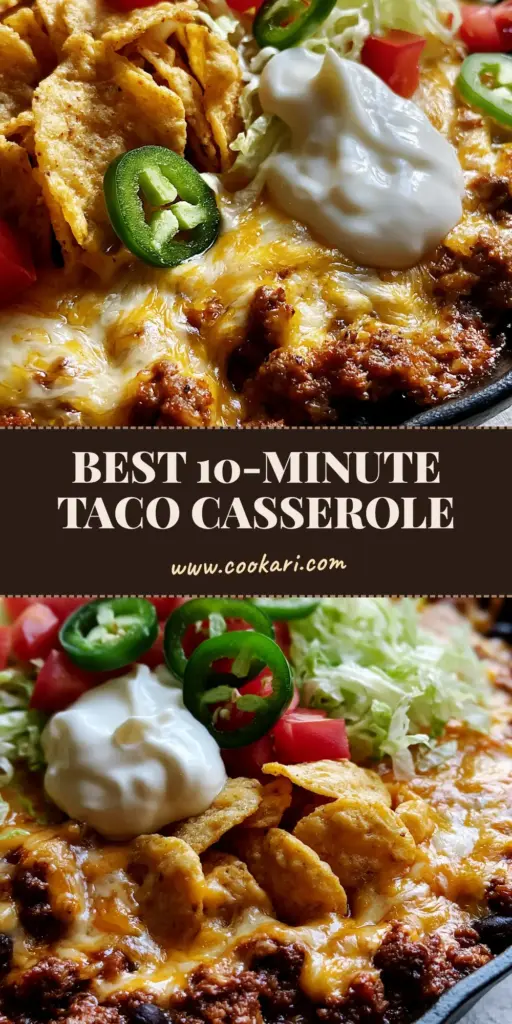
- Visual Appeal: Designed to look like a professional food photograph, the vibrant ruby-red tomatoes and bright green jalapenos pop against the dark skillet background.
- One-Pan Simplicity: This recipe minimizes cleanup by utilizing a single cast iron skillet for both searing and baking, making it one of our favorite lazy dinners for busy families.
The Anatomy of a Perfect Walking Taco Casserole
To achieve the specific visual and flavor profile described in our blueprint, every ingredient must serve a structural and culinary purpose. We don’t just throw things in a pan; we build layers of flavor that stand up to the oven’s heat.
Must-Have Ingredients for the Base
1 lb (450g) Ground Beef (80/20 Lean-to-Fat Ratio): The fat content is crucial for providing the “savory, crumbled” texture that carries the taco seasoning effectively across the palate. Using a higher fat ratio ensures the meat doesn’t dry out during the baking phase.
1 can (15 oz / 425g) Black Beans: These provide an earthy, creamy contrast to the richness of the beef. Ensure they are thoroughly rinsed and drained to prevent excess moisture from making the base “soupy.”
2 tbsp (30g) Homemade or High-Quality Taco Seasoning: A blend of chili powder, cumin, smoked paprika, and garlic powder creates the aromatic backbone of the dish. This seasoning is what gives the beef its signature “browned taco-seasoned” appearance.
1/2 cup (120ml) Beef Broth or Water: This is a foundational “invisible” ingredient. Adding a splash of liquid helps the seasoning emulsify and coat the beef and beans in a thick, glossy sauce.
The Cheesy “Bubbling” Layer
1.5 cups (170g) Sharp Cheddar Cheese: Sharp cheddar provides that essential “bold” flavor and a beautiful orange hue that contrasts with the dark beef. Always shred your own cheese from a block to avoid anti-caking agents that hinder the “bubbling” effect.
1.5 cups (170g) Monterey Jack Cheese: Known as one of the best “melters” in the culinary world, Monterey Jack provides the gooey, stretchy texture that holds the corn chips in place.
The “Crunchy” and “Fresh” Toppings
2 cups (approx. 100g) Golden Corn Chips: These should be thick and sturdy (like Fritos) to maintain their “crunchy” profile even when partially submerged in the melted cheese. Their saltiness balances the creaminess of the dairy.
2 cups (150g) Shredded Iceberg Lettuce: The high water content and “crisp” nature of iceberg lettuce offer a necessary cooling element to the hot casserole base. Shred it finely for a professional look.
3-4 Roma Tomatoes, Diced: These “ruby-red” gems add acidity and freshness. Removing the seeds before dicing helps keep the casserole from becoming watered down.
2 Fresh Jalapenos, Sliced into Rounds: Use “bright green” fresh jalapenos for a hit of heat and visual vibrance. If you prefer a milder dish, remove the white pith and seeds before slicing.
1/2 cup (120ml) Thick Sour Cream: A “glossy dollop” of full-fat sour cream adds a luxurious, velvety finish that ties all the spice and crunch together.
Essential Equipment for Skillet Success
To replicate the visual result of a “modern matte black cast iron skillet” meal, you need the right tools. A 12-inch (30cm) cast iron skillet is the gold standard for this recipe because of its superior heat retention and ability to go from stovetop to oven seamlessly.
You will also need a sturdy wooden spoon or meat masher to achieve that perfectly “crumbled” beef texture. For the garnishes, a sharp chef’s knife is essential for producing the “finely shredded” lettuce and “thin rounds” of jalapenos that define the dish’s professional aesthetic.
Step-by-Step Instructions: Mastering the Skillet Layers
Phase 1: Searing and Seasoning the Protein
Place your matte black cast iron skillet over medium-high heat. Add 1 tbsp (15ml) of neutral oil (like avocado or vegetable oil). Once the oil is shimmering, add the ground beef. Use your wooden spoon to break the meat into small, uniform crumbles.
Cook until a deep golden-brown crust forms on the beef. This “Maillard reaction” is vital for flavor. Once browned, drain any excess fat, but leave about a tablespoon for moisture. Stir in the taco seasoning and the rinsed black beans. Pour in your beef broth and simmer for 3-5 minutes until the liquid has reduced into a thick, savory glaze that clings to every piece of beef and bean.
Phase 2: The Dual-Cheese Melt
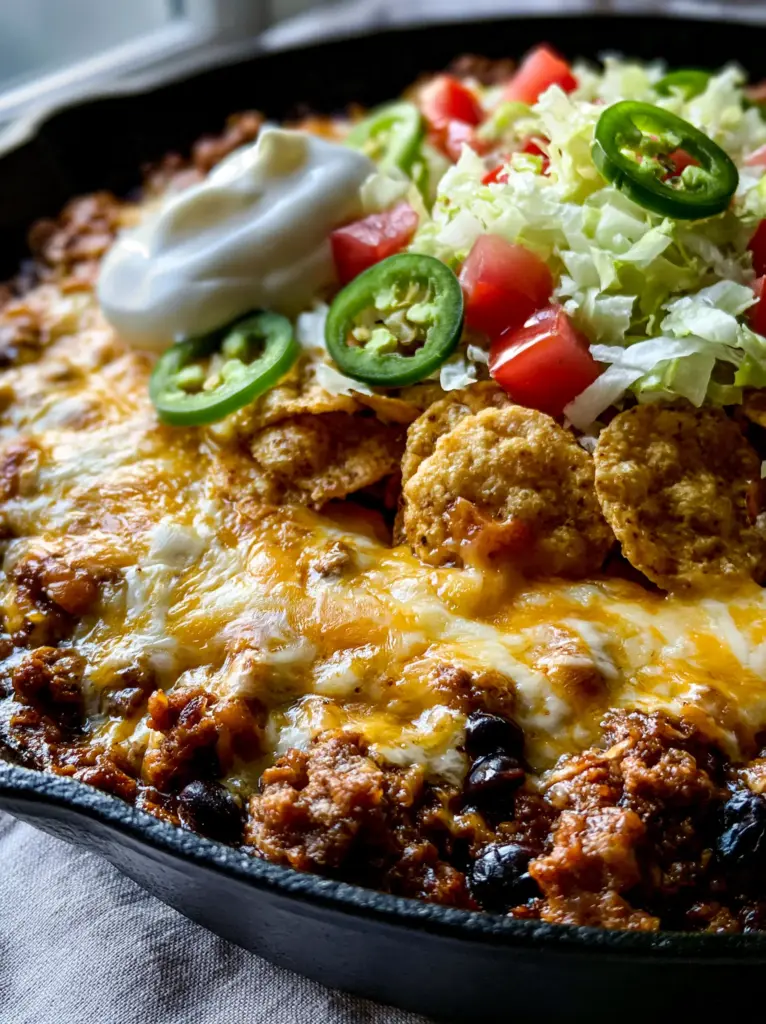
Preheat your oven to 400°F (200°C). Flatten the beef and bean mixture into an even layer in the skillet. This creates the “thick layer” mentioned in our visual blueprint. Combine the shredded Sharp Cheddar and Monterey Jack in a bowl, then spread them generously over the top.
Place the skillet in the oven for 8-10 minutes. Watch for the specific “Visual Cue”: the cheese should be heavy, bubbling, and just starting to brown at the edges. The aroma of toasted cheese and cumin should fill your kitchen.
Phase 3: The Crunch Factor
Carefully remove the hot skillet from the oven. Immediately take your golden corn chips and pile a cluster in the center, pressing some “partially” into the molten cheese. This ensures they stay in place while remaining “crunchy” on top. Return the skillet to the oven for just 2 more minutes—this lightly toasts the chips and bonds them to the cheese.
Phase 4: Finishing with Fresh Garnishes
Now comes the “Culinary Forensics” part: the cold toppings. Once the skillet has rested for 2-3 minutes (to avoid immediately wilting the greens), scatter the finely shredded iceberg lettuce around the edges. Top with the vibrant diced Roma tomatoes and the thin rounds of fresh jalapenos. Finally, place a thick, glossy dollop of sour cream right in the center.
Expert Tips for the Ultimate Walking Taco Casserole
- The “Resting” Rule: Let the beef mixture rest for a few minutes after simmering before adding the cheese. This prevents the cheese fat from separating and becoming greasy.
- Keep the Crunch: Only add the corn chips and cold toppings right before serving. If you are making this for a party, like our new years eve snacks, serve the cold garnishes on the side to keep everything fresh.
- The Skillet Secret: If you don’t have a cast iron skillet, a heavy stainless steel pan works, but you may lose some of that bottom-layer “sear” that cast iron provides.
- Spice Control: For a more kid-friendly version, swap the fresh jalapenos for pickled ones or omit them entirely, focusing instead on the savory beef and melty cheese.
Storage, Reheating, and Make-Ahead Advice
The Walking Taco Casserole is best enjoyed fresh due to the “crunchy” corn chips and “crisp” lettuce. However, you can easily prep the components in advance. Store the cooked beef and bean mixture in an airtight container for up to 3 days.
To reheat, place the beef mixture back in a skillet or oven-safe dish and heat at 350°F (175°C) until bubbling. Only then should you add the fresh cheese, chips, and garnishes. We do not recommend freezing the assembled casserole as the lettuce and sour cream do not hold up to the freezing process. For more prep-ahead ideas, check out our guide to crockpot meals.
What to Serve with Your Skillet Masterpiece
This casserole is a complete meal on its own, but it pairs beautifully with other Tex-Mex inspired sides. Consider serving it alongside a refreshing corn salad or a batch of watermelon fries for a sweet and salty contrast. If you’re hosting a larger gathering, this dish fits perfectly alongside easter finger foods or a vibrant coconut chicken rice bowl for a fusion-style feast.
Frequently Asked Questions
Absolutely! While the skillet offers a unique sear, a 9×13 dish works perfectly for layering. Just follow the same baking temperature and visual cues for bubbling cheese.
Yes, ground turkey is a great lean alternative. Just be sure to add a teaspoon of olive oil when browning to compensate for the lower fat content and keep the meat moist.
The key is to add the chips during the last 2 minutes of baking so they bond to the cheese without absorbing too much moisture, and always serve immediately after adding fresh garnishes.
The base recipe is mild to medium, but you can control the heat by using mild taco seasoning and removing the seeds from the fresh jalapenos before garnishing.
Thick, sturdy corn chips like Fritos are ideal because they maintain their ‘crunchy’ texture under the weight of the cheese and beef, unlike thinner tortilla chips.
The Complete Walking Taco Casserole Recipe
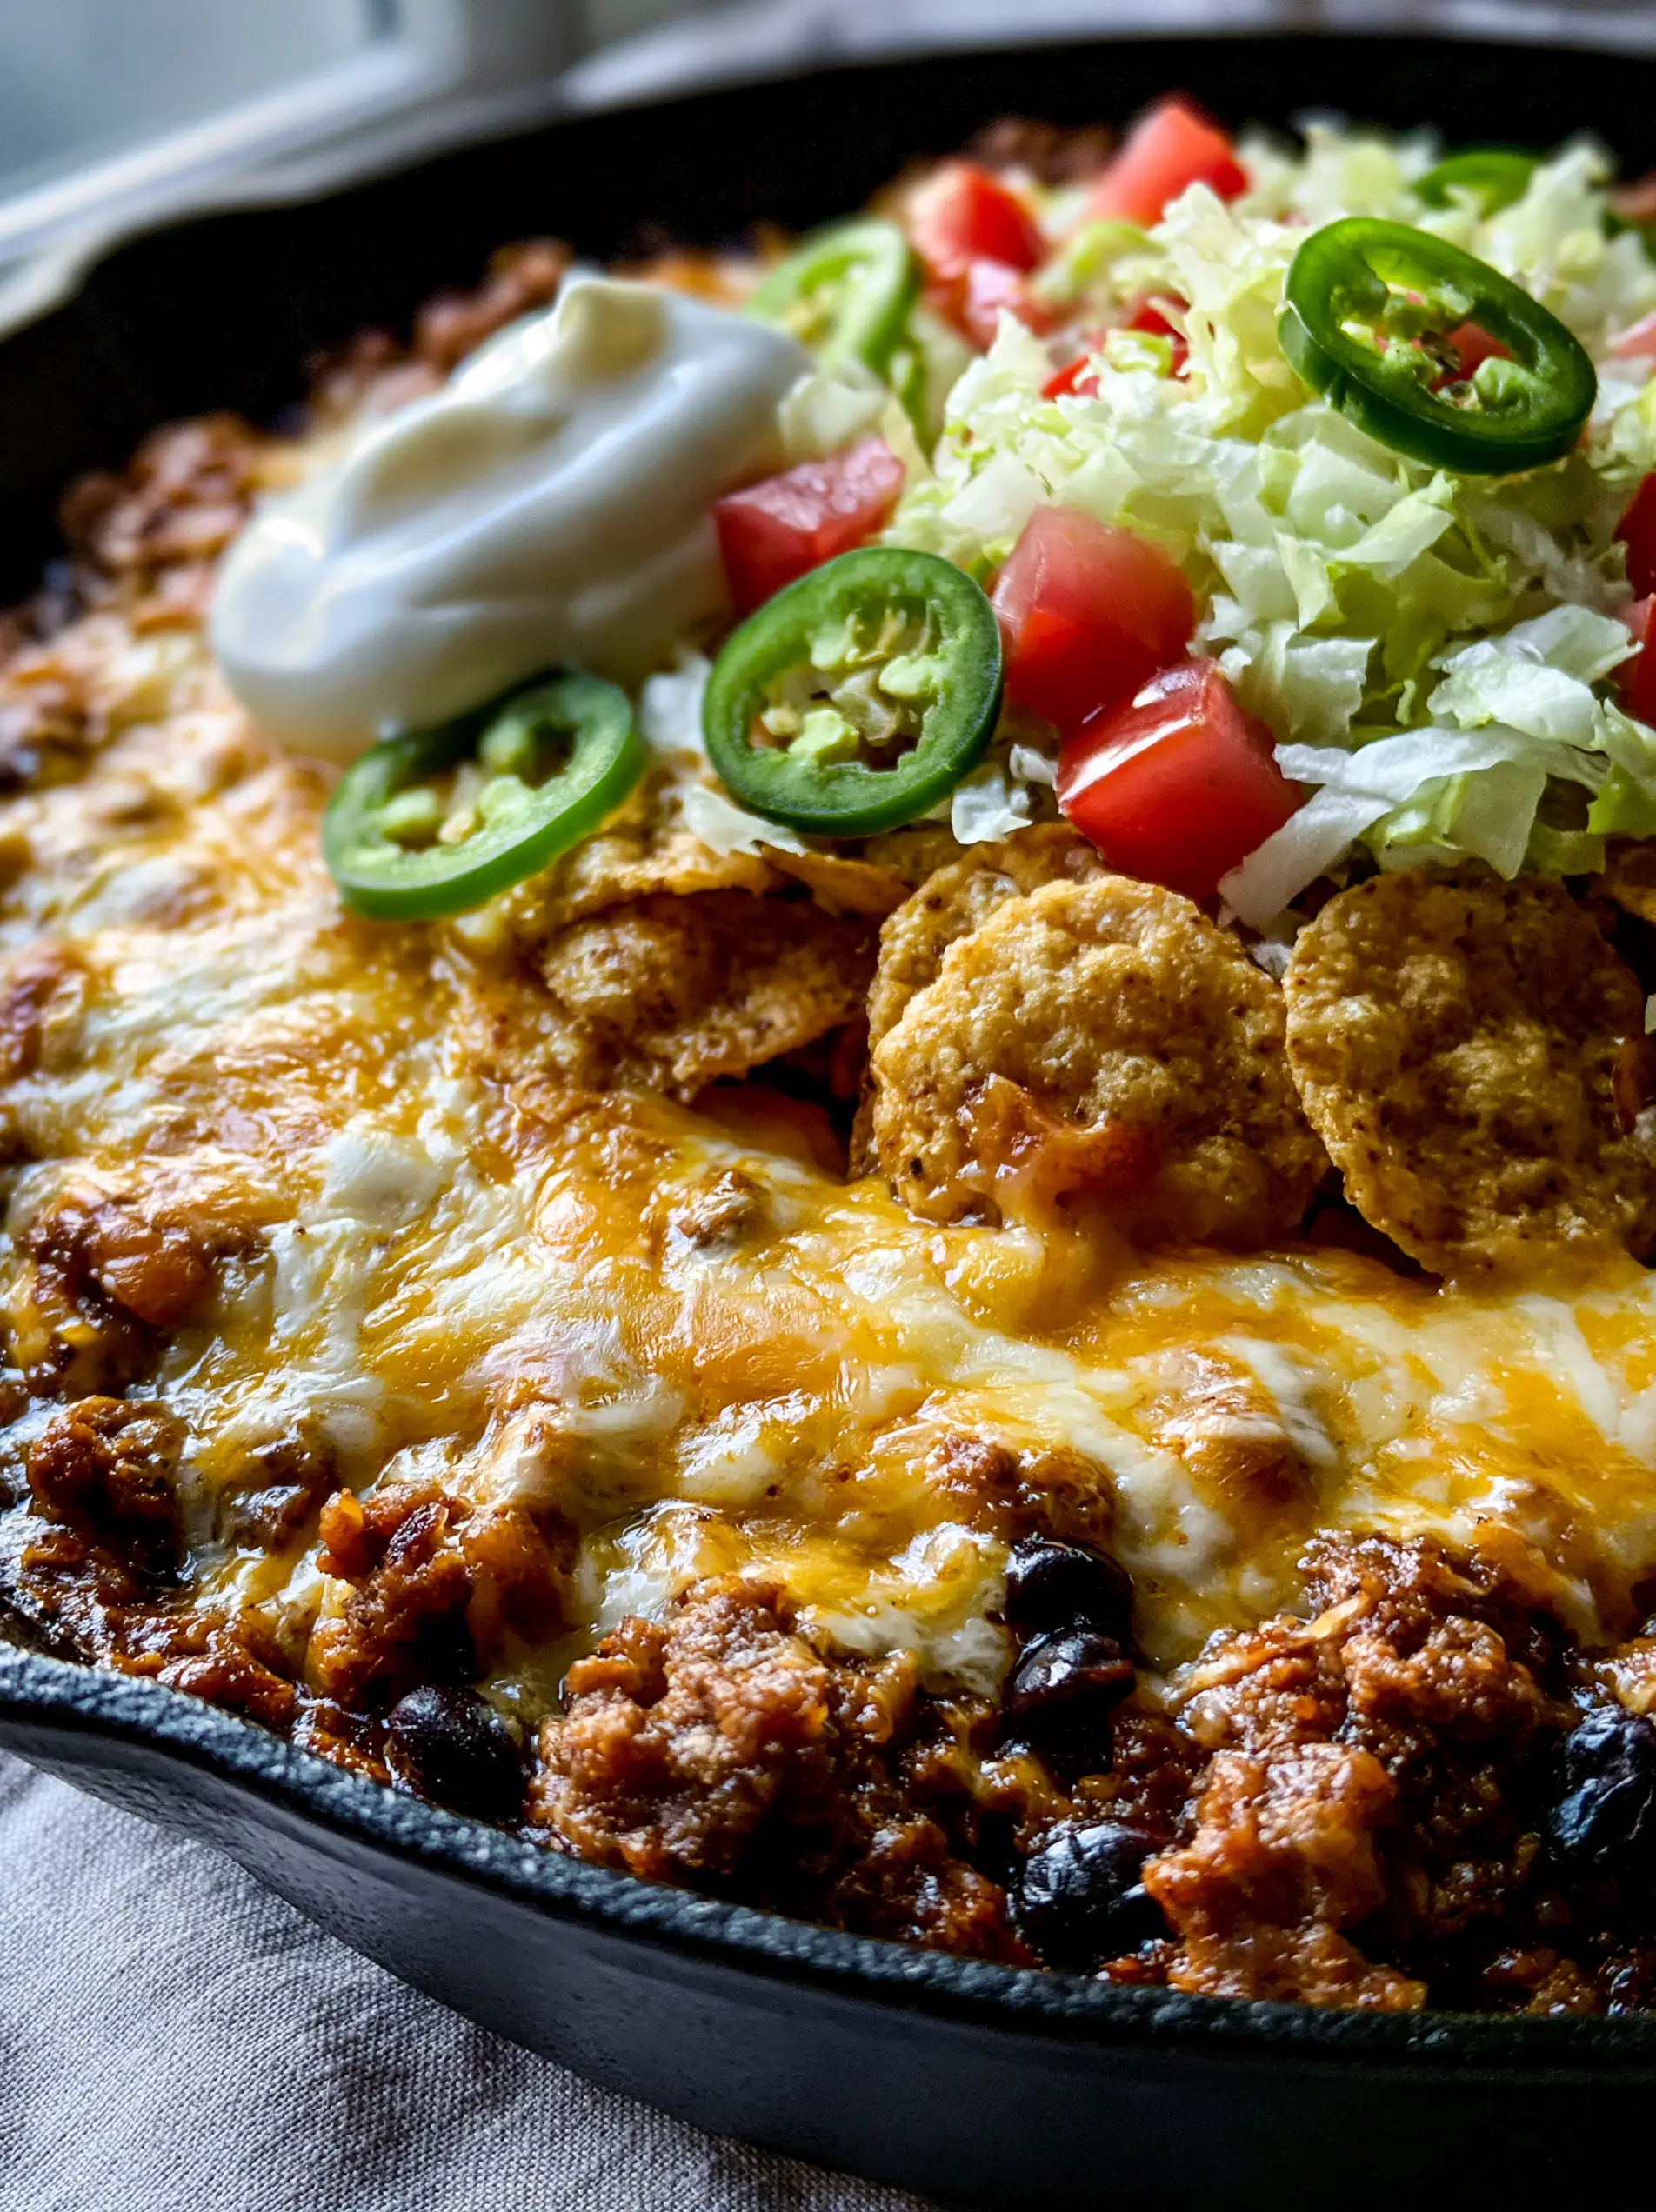
Walking Taco Casserole: The Ultimate Cheesy Skillet Dinner
Ingredients
Equipment
Method
- Heat oil in a 12-inch matte black cast iron skillet over medium-high heat. Add ground beef and cook, breaking into crumbles, until a deep golden-brown crust forms.
- Drain excess fat. Stir in taco seasoning, black beans, and beef broth. Simmer for 3-5 minutes until the sauce is thick and glossy.
- Top the beef mixture with shredded Cheddar and Monterey Jack. Bake at 400°F (200°C) for 8-10 minutes until the cheese is heavy and bubbling.
- Pile corn chips in the center, pressing some into the cheese. Bake for 2 more minutes to toast the chips.
- Top with shredded lettuce, diced tomatoes, sliced jalapenos, and a thick dollop of sour cream. Serve immediately from the skillet.
Notes
Add cold toppings only right before serving to maintain the crisp texture of the lettuce.
Closing & Call to Action
This Walking Taco Casserole is more than just a meal; it is a texture-rich, flavor-packed experience that brings the fun of the fairground to your dining table. With its bubbling cheese, crunchy chips, and fresh garnishes, it’s a guaranteed hit for any occasion. If you loved this skillet dinner, please leave a comment below and share your photos with us!
Don’t forget to follow us on Pinterest for more inspired recipes like this one. Pin the image below to save this recipe for your next family dinner night!