Zucchini balls are the ultimate summer appetizer, transforming humble garden squash into golden, crispy spheres of pure comfort. If you have ever struggled with soggy vegetable fritters, this recipe is designed to change your culinary life forever. We are focusing on a rugged, panko-encrusted exterior that shatters upon the first bite to reveal a steaming, herb-flecked interior.
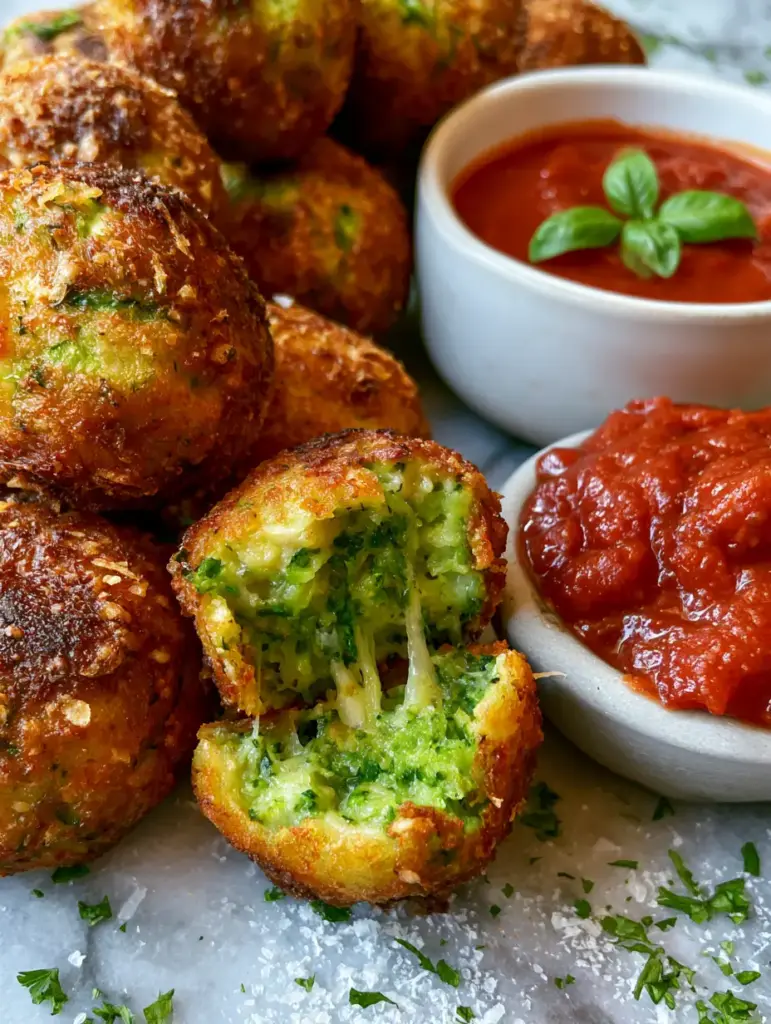
Imagine a pile of these golden-brown treasures resting on a cool marble surface, their surfaces shimmering with shards of toasted parmesan. As you break one open, a stream of fragrant steam escapes, followed by the irresistible pull of melted mozzarella strings. This is not just a snack; it is a sensory experience designed to be dipped into a thick, glossy red marinara sauce.
Whether you are looking for a way to use up a backyard harvest or simply want a sophisticated meatless treat, these Zucchini balls deliver on every level. The contrast between the emerald green zucchini flecks and the deep bronze of the crust makes them a visual masterpiece for any table. Let’s dive into the science of achieving that perfect, crunch-heavy finish.
The Secret to Achieving a Rugged, Ultra-Crispy Exterior
The hallmark of a superior zucchini ball is the texture of its crust. We achieve this by using a specific blend of Japanese panko breadcrumbs and high-quality Parmesan cheese shards. Unlike standard breadcrumbs, panko has a larger surface area that creates an uneven, rugged landscape, allowing for maximum crunch in every mouthful.
During the cooking process, the Parmesan cheese doesn’t just melt; it toasts into savory shards that bond with the panko. This creates a structural lattice that stays crispy even as the moisture from the zucchini center tries to soften it. It is a delicate balance of moisture management and high-heat browning.
To ensure the interior remains vibrant and moist without being watery, we utilize a crucial “salt and squeeze” technique. By drawing out excess liquid from the grated squash, we concentrate the flavor and ensure the balls hold their shape. This allows the fresh herbs—parsley and basil—to shine through in the steaming green center.
Essential Ingredients for Gourmet Zucchini Rounds
Grated Zucchini: 3 cups (approx. 450g) of fresh zucchini provides the base of our recipe. Ensure you use a box grater for medium-sized flecks that remain visible in the final dish, providing that beautiful emerald green contrast.
Panko Breadcrumbs: 1.5 cups (90g) are essential for that signature rugged crust. Panko absorbs less oil than traditional crumbs, ensuring the Zucchini balls remain light and airy rather than greasy.
Parmesan Cheese: 1 cup (80g) of freshly grated Parmesan serves two purposes. Half goes into the dough for salty depth, and the other half forms those toasted shards on the exterior crust.
Mozzarella Pearls: 12-15 small mozzarella pearls (approx. 150g) are tucked into the center of each ball. This is the secret to the “melted cheese strings” that appear when the ball is pulled apart.
Fresh Herbs (Parsley and Basil): 1/4 cup (10g) of finely chopped parsley and a handful of fresh basil leaves. These provide the “steaming herb-filled center” and a punch of aromatic freshness that cuts through the richness of the cheese.
Large Egg: 1 egg (50g) acts as the primary binder. It emulsifies with the moisture in the zucchini to create a cohesive dough that won’t fall apart during the breading process.
Garlic and Seasonings: 2 cloves of minced garlic, 1 tsp (6g) coarse sea salt, and a pinch of black pepper. These foundational ingredients enhance the natural sweetness of the squash.
Marinara Sauce: 1 cup (245g) of thick, glossy red marinara. Serving this on the side provides a bright, acidic counterpoint to the savory, salty balls.
Tools Required for Culinary Precision
To achieve the visual perfection seen in our blueprint, a few specific tools are necessary. A box grater is required for the zucchini to get the right “fleck” size. Using a food processor can often turn the zucchini into a paste, which we want to avoid for texture’s sake.
A clean kitchen towel or cheesecloth is non-negotiable for squeezing out the zucchini juice. Additionally, a parchment-lined baking sheet or a high-sided skillet (if frying) is needed. For the most handheld, rustic look, a light grey marble serving board highlights the golden tones of the crust beautifully.
Step-by-Step Evolution: From Squash to Golden Sphere
Step 1: The Moisture Extraction Ritual
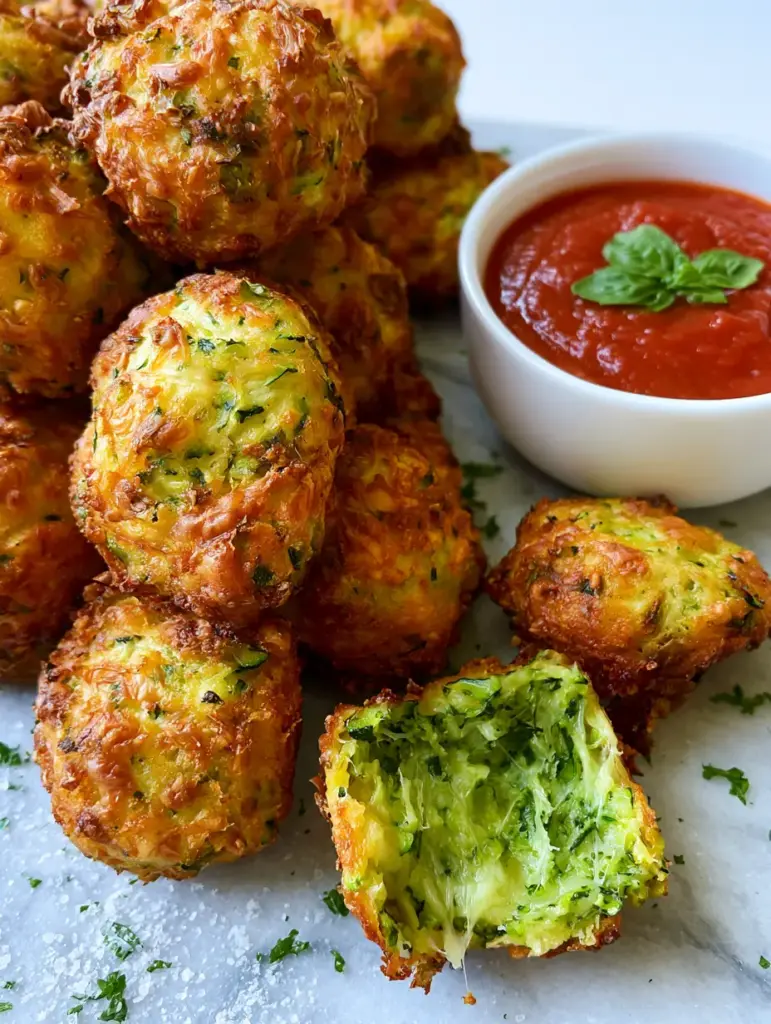
Start by grating your zucchini into a large bowl. Sprinkle with half of the coarse sea salt and let it sit for 10 minutes; you will notice the squash beginning to “sweat” as the salt draws out the water. Transfer the zucchini to a clean kitchen towel and wring it out with all your strength until you have a dry, compact ball of squash.
Step 2: Engineering the Herb-Filled Interior
In a fresh bowl, combine the squeezed zucchini, egg, half of the parmesan, garlic, and the finely chopped parsley. Mix until the emerald green flecks are evenly distributed. The mixture should feel moist but hold its shape when pressed together between your palms.
Step 3: Creating the Mozzarella Surprise
Scoop about 2 tablespoons (30ml) of the mixture and flatten it in your hand. Place a mozzarella pearl in the center and wrap the zucchini dough around it, rolling it into a tight sphere. Ensure the cheese is completely sealed inside to prevent it from leaking out before the crust is set.
Step 4: Dredging for the Rugged Crust
Combine the panko and the remaining parmesan shards in a shallow dish. Roll each ball in the mixture, pressing firmly so the panko and cheese shards adhere to the surface. You want an uneven, textured coating that looks “rugged” rather than perfectly smooth.
Step 5: The Golden Transformation
Heat oil in a skillet or preheat your oven to 400°F (200°C). Cook the balls until the crust transitions from pale to a deep, golden brown. Listen for the sizzle and look for the parmesan shards to turn a toasted amber color. This usually takes about 4-5 minutes per side in a pan or 20 minutes in the oven.
Professional Secrets for Perfect Zucchini Balls
- Keep the Zucchini Cold: If your zucchini mixture gets too warm, the cheese inside may melt before the crust is crispy. Work quickly or chill the rolled balls for 15 minutes before breading.
- Don’t Overcrowd the Pan: Whether baking or frying, space is your friend. Crowding leads to steaming rather than searing, which will ruin that “shattered” crust texture.
- The Sea Salt Finish: Always sprinkle a pinch of coarse sea salt over the balls immediately after they come out of the heat. The heat helps the salt crystals “grip” the crust for a professional finish.
- Fresh Herb Garnish: Add the chopped parsley and fresh basil at the very last second. This ensures the herbs stay vibrant green and don’t wilt against the heat of the golden-brown crust.
Optimal Storage and Reheating Methods
Zucchini balls are best enjoyed immediately to experience the “melted mozzarella strings” at their peak. However, if you have leftovers, store them in an airtight container in the refrigerator for up to 3 days. Avoid using a microwave for reheating, as it will make the panko crust soggy.
To restore the original crunch, reheat them in an air fryer at 350°F (175°C) for 4-5 minutes, or in a toaster oven. For long-term storage, you can freeze the breaded (but uncooked) balls for up to 2 months. Cook them directly from frozen, adding an extra 5-8 minutes to the cooking time.
Delicious Pairings and Serving Ideas
These crispy delights are incredibly versatile. While a classic glossy marinara is the standard, they also pair beautifully with a cool yogurt-based zucchini dip for a double-dose of summer squash. For a full Mediterranean spread, serve them alongside savory zucchini feta balls and a crisp Greek salad.
If you are looking for a more substantial meal, these balls can be served over a bed of pasta or tucked into a sub roll for a “zucchini ball parmesan” sandwich. They also make a fantastic side dish for garlic butter zucchini or even a hearty zucchini corn tomato bake.
Frequently Asked Questions
Yes! Air fry them at 375°F (190°C) for 10-12 minutes, shaking the basket halfway through until the crust is golden-brown and crispy.
Absolutely. You can substitute the panko with gluten-free panko or almond meal, though the texture will be slightly less ‘rugged’ than the original.
The key is removing as much moisture as possible from the zucchini and using a binding agent like an egg. If the mixture feels too wet, add a tablespoon of flour or more panko.
Mozzarella pearls or small cubes of low-moisture mozzarella provide the best ‘cheese strings.’ For more flavor, you can try fontina or provolone.
Sogginess usually comes from trapped moisture. Ensure you salt and squeeze the zucchini aggressively in a towel before mixing the dough.
The Ultimate Crispy Zucchini Balls Recipe
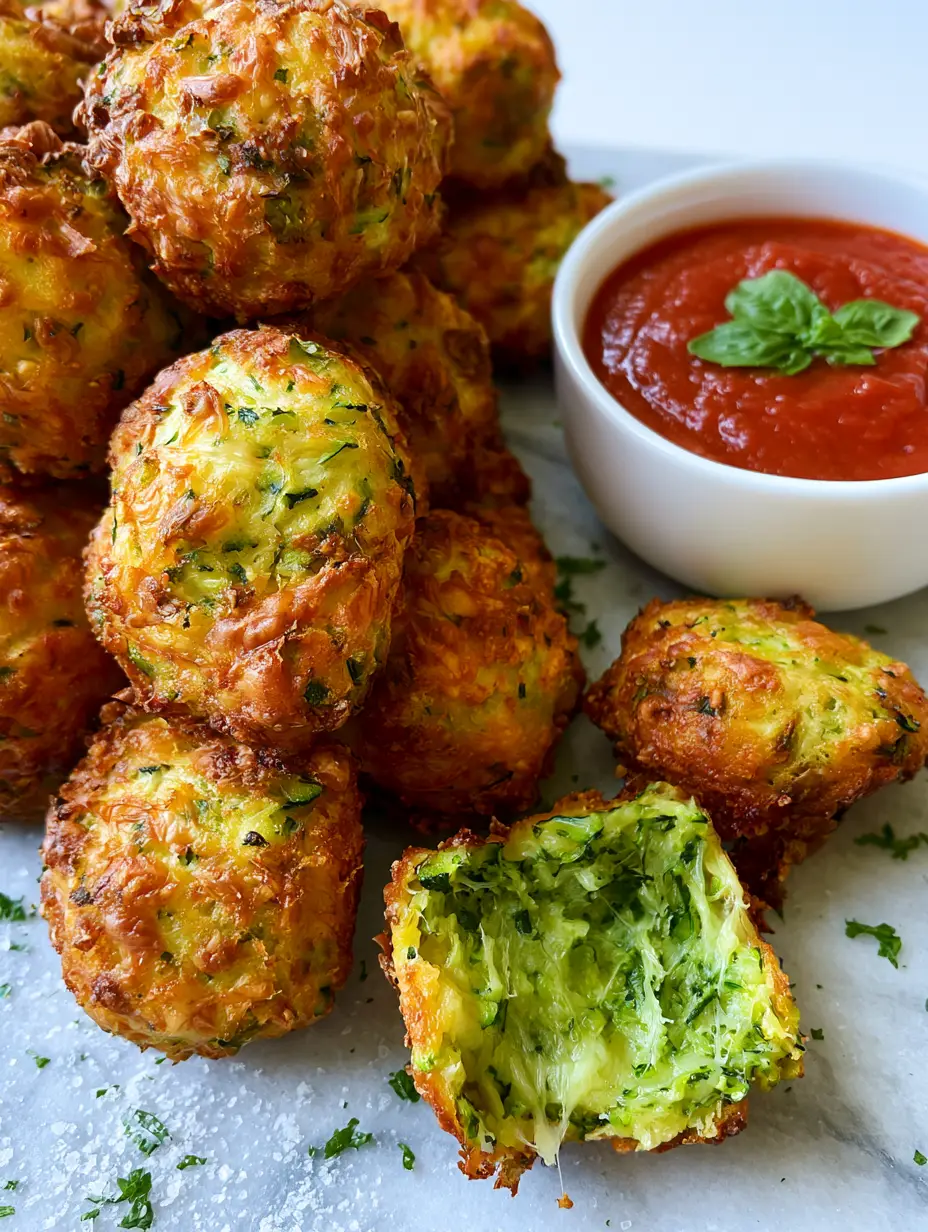
Zucchini balls with a Crispy Parmesan Crust and Melting Mozzarella Centers
Ingredients
Equipment
Method
- Salt the grated zucchini and let sit for 10 minutes. Wring out thoroughly in a kitchen towel until dry.
- Combine squeezed zucchini, egg, half the parmesan, garlic, and parsley in a bowl.
- Form small balls around a mozzarella pearl, sealing tightly.
- Roll in a mixture of panko and remaining parmesan shards until ruggedly coated.
- Bake at 400°F (200°C) or pan-fry until the crust is deep golden-brown and parmesan shards are toasted.
Notes
Serve immediately for the best cheese pull.

Bring the Crunch to Your Kitchen
There is nothing quite like the satisfaction of breaking into a perfectly cooked zucchini ball and seeing those melted cheese strings. This recipe captures the essence of summer with its vibrant green interior and toasted parmesan exterior. It is a dish that proves vegetables can be just as indulgent and crave-worthy as any meat-based appetizer.
If you enjoyed making these, we would love to hear about it! Leave a comment below and tell us how your crust turned out. Don’t forget to follow us on Pinterest for more visual recipe inspiration and share your creations with the community. Happy cooking!