There is something undeniably hypnotic about a bubbling cast iron skillet emerging from the oven, its edges laced with golden-brown toasted cheese and its center filled with charred, fire-roasted corn. This Baked Elote Dip is not just another party snack; it is a meticulously crafted homage to the vibrant flavors of Mexican street corn, redesigned for the ultimate “cheese pull” experience. Whether you are hosting a summer backyard bash or looking for a cozy comfort food fix, this dip delivers a sophisticated balance of smoky, zesty, and creamy notes that will leave your guests hovering over the skillet.
Imagine plunging a thick, toasted yellow corn tortilla chip into a molten layer of Monterey Jack, breaking through to a velvety cream cheese base studded with kernels of fire-roasted yellow corn. Every bite is punctuated by the salty tang of crumbled cotija and the citrusy brightness of fresh lime. Inspired by the handheld elotes found at street carts in Mexico City, this version transforms the iconic snack into a warm, shareable masterpiece that is as visually stunning as it is delicious.
Why You Will Absolutely Love This Hot Corn Dip
- The Perfect Texture Contrast: We combine a silky-smooth cream cheese foundation with the firm, “pop-in-your-mouth” texture of fire-roasted yellow corn for a multi-dimensional mouthfeel.
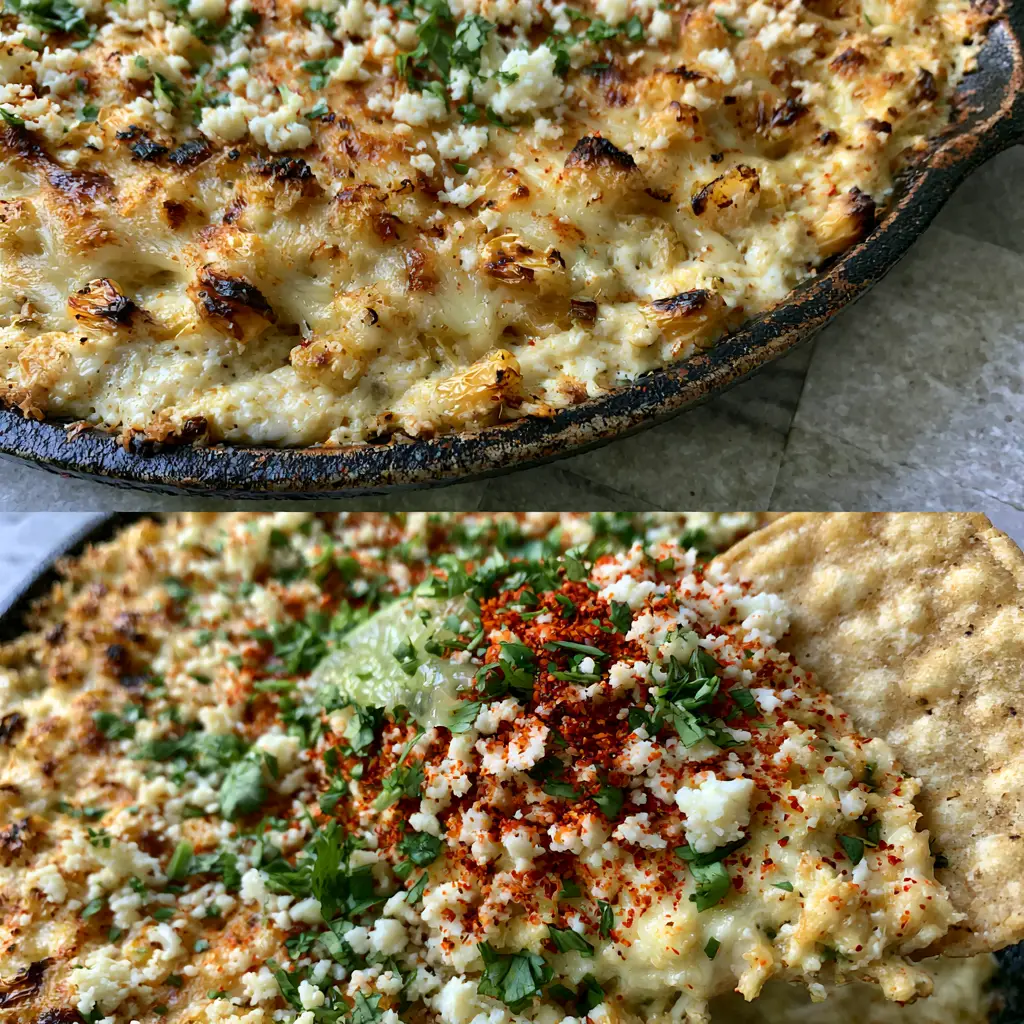
- Visual Showstopper: With its vibrant dusting of red tajin chili powder and finely chopped green cilantro, this dish is designed to be the centerpiece of your table.
- Authentic Flavor Profile: By utilizing charred corn and real cotija cheese, we capture the smoky essence of traditional street corn.
- Epic Cheese Pull: The inclusion of high-moisture Monterey Jack ensures every scoop creates those long, stretchy cheese strands that make for a perfect food photo.
The Anatomy of a Perfect Skillet Elote: Essential Ingredients
To achieve the result seen in our visual blueprint, every ingredient must serve a specific culinary purpose. We don’t just use corn; we use fire-roasted corn for depth. We don’t just use cheese; we use a blend of melting and finishing cheeses to ensure structural integrity and flavor punch.
Fire-Roasted Yellow Corn: 3 cups (approx. 500g). You can use fresh corn charred on a grill or high-quality canned fire-roasted corn. This provides the smoky, caramelized sweetness that defines the dish.
Cream Cheese: 8 oz (225g), softened. This serves as our “foundational invisible ingredient,” providing the thick, spreadable body that holds the other elements in suspension during the bake.
Monterey Jack Cheese: 1.5 cups (170g), shredded. This is your primary melting cheese. Its mild flavor doesn’t compete with the corn, but its high fat content creates that bubbly, golden-brown crust on the edges.
Cotija Cheese: 1/2 cup (60g), crumbled. Unlike the Monterey Jack, Cotija doesn’t melt. It stays in salty, tangy white clumps on top, providing a sharp contrast to the rich base.
Sour Cream or Mexican Crema: 1/2 cup (120ml). This adds the necessary acidity and prevents the cream cheese from becoming too dense or “heavy” when heated.
Tajin Chili Powder: 1 tbsp (7g). A blend of chili, lime, and sea salt, this provides the iconic red dusting and a zesty kick that cuts through the fat of the cheeses.
Fresh Cilantro & Lime: 1/4 cup (10g) chopped cilantro and 2 large lime wedges. These are non-negotiable for freshness. The lime juice brightens the heavy fats, while the cilantro adds an earthy, herbal finish.
The “Hidden” Flavor Boosters: 1/2 tsp (3g) cracked black pepper, 1 tsp (5g) garlic powder, and a pinch of salt. These ensure the base is seasoned from within, not just on the surface.
The Right Tools for a Golden Crust
While you can bake this in a glass casserole dish, for the most authentic result—and to match our visual prompt—a 10-inch (25cm) rustic black cast iron skillet is essential. Cast iron retains heat exceptionally well, which is what creates those coveted golden brown baked edges where the Monterey Jack meets the metal. You will also need a sturdy spatula for folding the creamy base and a sharp chef’s knife for finely chopping the cilantro.
Master the Skillet: How to Make Baked Elote Dip
Phase 1: Prepping the Fire-Roasted Base
If you are starting with fresh corn, start by searing the kernels in your cast iron skillet with a tablespoon (15g) of butter over high heat. Look for the kernels to begin popping and developing dark brown “char” marks. This Maillard reaction is what creates the “fire-roasted” flavor profile. If using canned fire-roasted corn, drain it thoroughly; excess moisture is the enemy of a thick dip.
Phase 2: Folding the Creamy Layers
In a medium mixing bowl, combine your softened cream cheese, sour cream, garlic powder, and cracked black pepper. Use a spatula to fold these together until smooth. Gently stir in 2 cups (330g) of your charred corn and 1 cup (115g) of the shredded Monterey Jack. This internal cheese will create the “bubbly” interior seen in our close-up overhead shots.
Phase 3: Achieving the Perfect Cheesy Pull
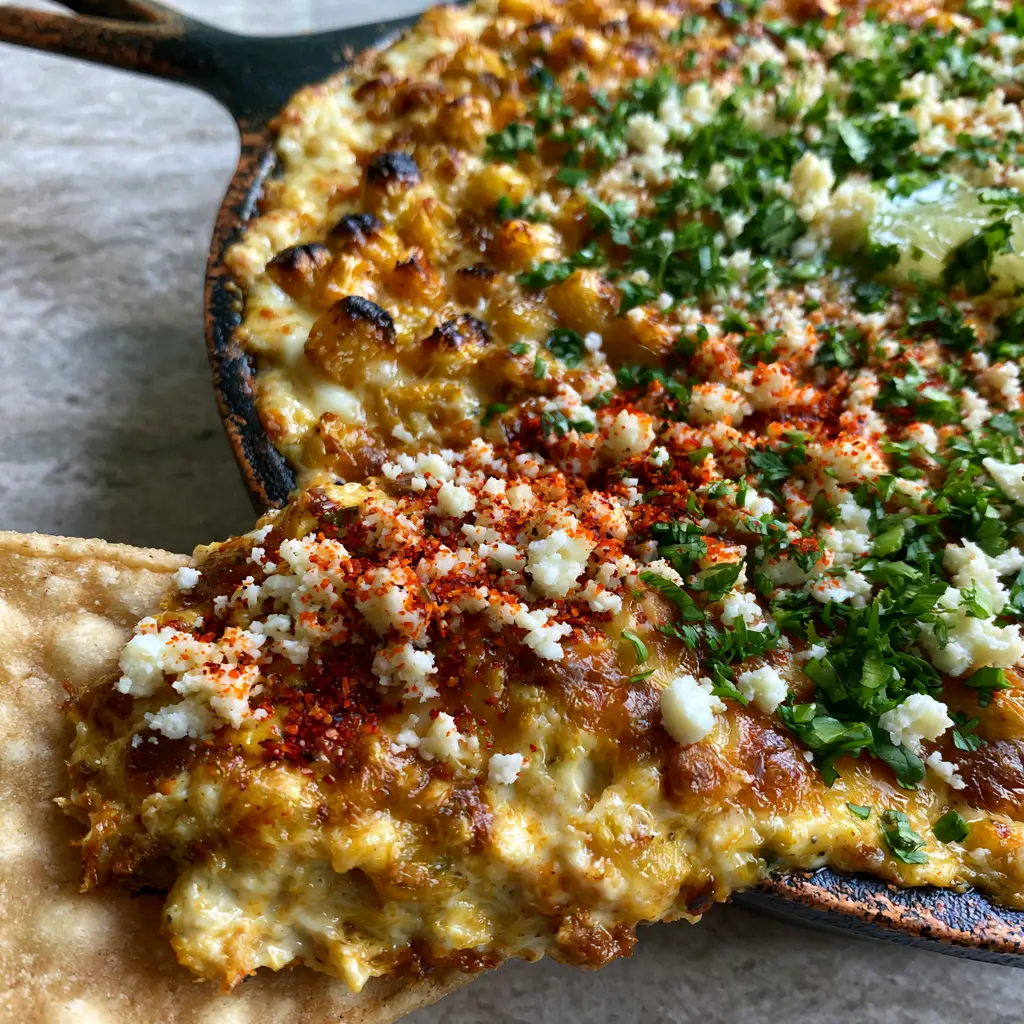
Spread the mixture evenly into your cast iron skillet. Top with the remaining Monterey Jack and the rest of the fire-roasted corn kernels. Bake at 400°F (200°C) for 15-20 minutes. You are looking for specific sensory cues: the edges should be bubbling vigorously, and the cheese on top should be melted and starting to develop small golden-brown spots. For the ultimate visual, switch to the broiler for the last 60 seconds to “blister” the cheese surface.
Phase 4: The Finishing Touches
Immediately upon removing from the oven, garnish with a heavy dusting of red tajin chili powder. Sprinkle the crumbled cotija cheese and the finely chopped fresh green cilantro across the surface. Squeeze the juice from one lime wedge over the top while the dip is still sizzling to release the aromatic oils of the cilantro. Serve with toasted yellow corn tortilla chips for that iconic “scoop” shot.
Chef Secrets for the Best Street Corn Flavor
- Room Temperature Ingredients: Always ensure your cream cheese is completely softened. If it’s cold, it will leave “lumps” in your dip rather than creating a seamless, velvety base.
- Don’t Oversalt: Cotija cheese and Tajin both contain significant amounts of salt. Taste your corn mixture before adding extra sea salt to avoid an oversalted dish.
- The Broiler Trick: If your dip is hot but not “browned,” don’t keep baking it or the cream cheese will break and become oily. Use the broiler to get that golden color in seconds.
- Freshly Grated Cheese: Avoid pre-shredded Monterey Jack if possible. Pre-shredded cheeses are coated in potato starch to prevent clumping, which can hinder the perfect “cheesy pull” we see in the smartphone photography style.
Keeping It Fresh: Storage and Reheating
If you have leftovers of this Baked Elote Dip, they can be stored in an airtight container in the refrigerator for up to 3 days. However, the texture of the cotija and cilantro will change. To reheat, I recommend placing the dip back into a skillet or oven-safe dish and heating at 350°F (175°C) until bubbly. Microwaving is faster but can cause the fats in the cheese to separate, leading to a slightly greasier texture.
We do not recommend freezing this dip. The high dairy content (cream cheese and sour cream) tends to become grainy and lose its structural integrity once thawed and reheated.
Ultimate Pairings for Your Fiesta
This dip is a powerhouse on its own, but it truly shines when part of a larger spread. If you love corn-based appetizers, try pairing this with our classic corn dip or the fan-favorite crack corn dip for a corn-themed flight. For a refreshing balance to the rich cheeses, a watermelon feta salad or a mediterranean feta salad provides the perfect acid-driven palate cleanser.
Looking for more hot, cheesy snacks? These cheesy baked zucchini tots or our zucchini squash casserole offer a great vegetable-forward contrast to the decadent corn dip. If you’re serving a crowd, consider a side of various pasta salads, specifically the italian tortellini pasta salad for a hearty accompaniment.
Your Burning Questions Answered
You can assemble the dip base and corn in the skillet up to 24 hours in advance. Cover and refrigerate, then add the top layer of cheese just before baking. Add 5 minutes to the bake time if starting from cold.
Yes, you can use frozen corn. For the best result, thaw it completely and pat it dry with a paper towel before searing it in the skillet to achieve the fire-roasted char without excess moisture.
To increase the heat, fold finely diced fresh jalapeños or serrano peppers into the cream cheese base, or add an extra teaspoon of Tajin chili powder and a dash of cayenne pepper.
The dip itself is naturally gluten-free if using standard cheeses and spices. Always serve with 100% corn tortilla chips to ensure the entire appetizer remains gluten-free for your guests.
If you cannot find Cotija, Feta cheese is the closest substitute due to its salty, crumbly texture. Parmesan cheese can also work in a pinch, though it is less traditional.
Baked Elote Dip: The Recipe Card
Baked Elote Dip: The Ultimate Cheesy Mexican Street Corn Appetizer
Ingredients
Equipment
Method
- If using fresh corn, char the kernels in the skillet with butter until popped and browned. If using canned, drain and set aside.
- In a bowl, combine softened cream cheese, sour cream, garlic powder, and black pepper. Fold in 2 cups (330g) of corn and 1 cup (115g) of Monterey Jack.
- Spread the mixture in the cast iron skillet. Top with remaining corn and Monterey Jack. Bake at 400°F (200°C) for 15-20 minutes until bubbling and golden.
- Remove from oven. Dust with Tajin, top with Cotija and cilantro, and squeeze fresh lime juice over the top. Serve with tortilla chips.
Notes
Use the broiler for 60 seconds at the end for extra charred cheese spots.

Wrap Up: Your Next Crowd-Pleaser Awaits
Baked Elote Dip is more than just a recipe; it’s a sensory experience that combines the nostalgia of street food with the indulgence of a gourmet baked appetizer. From the first sight of the bubbling Monterey Jack to the final salty crunch of a cotija-coated chip, this dish is designed to impress. Its vibrant colors and complex flavor profile make it a standout addition to any menu.
If you enjoyed this recipe, please leave a comment below and let us know how your cheese pull turned out! Don’t forget to sign up for our newsletter for more elite recipes and share your skillet masterpieces on Pinterest.